What's new

Timberwolf's ultimate PDP Mortal Kombat TE fightstick mod (project log)

Timberwolf's ultimate PDP Mortal Kombat TE fightstick mod (project log) **UPDATE: FINISH HIM!**

UPDATE: Here's the finished product!


Original Post:

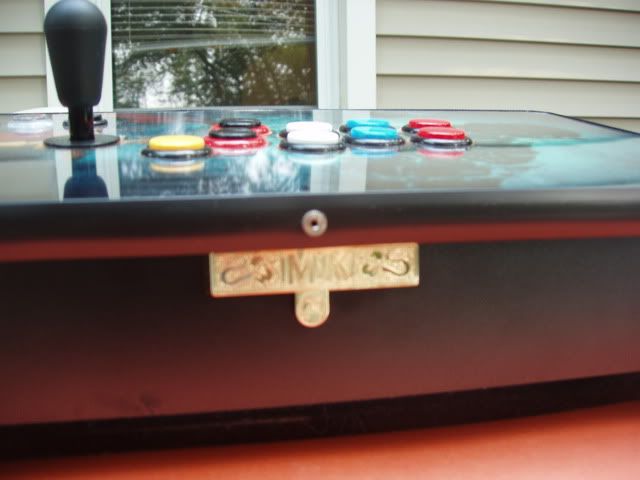
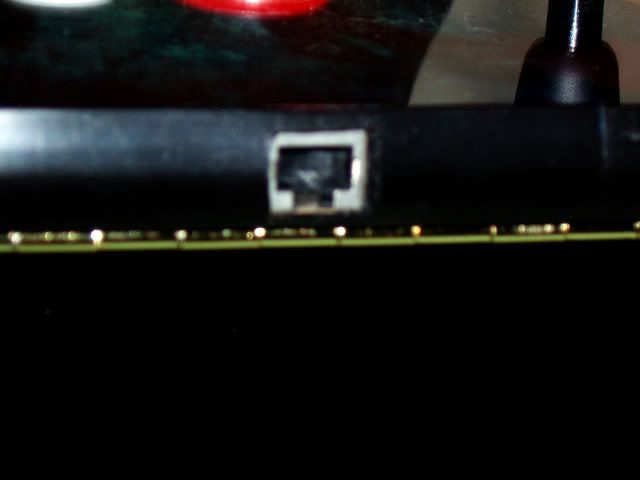
So I picked up a copy of Mortal Kombat TE the other day and I was quite happy with PDP's Tournament Edition fightstick once I had installed the parts I wanted in it (iL Eurostick and Happ competition buttons). However, I wanted to take things quite a few steps further than most people dared-- namely, a new button layout, Japanese parts, new artwork, multi-console support, an RJ45 jack, and of course a new plexiglass overlay. Essentially, I am talking about building a brand new control panel for this thing. I must say up front, this mod is not for the faint of heart, and I am already beyond the point of no return. Even so, I am still excited to be doing something new and unique with PDP's fightstick.

Here is my PDP TE just moments before the vicious attack.


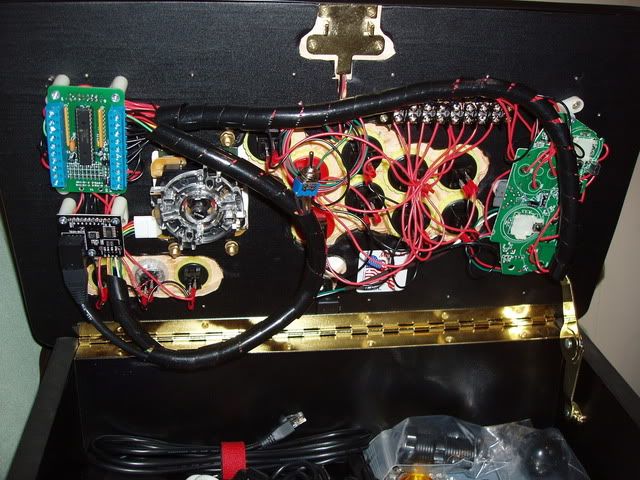
And this is the control panel after I removed it from the piano hinges, tore out the T-molding, and ripped the Plexiglass off of it.


This thing was definitely NOT designed with custom artwork in mind. They covered the whole control panel with this nasty carpet tape stuff which made getting the plexiglass off a pain in the ass, and artwork itself is actually printed onto the back of the plexiglass. For all the friendliness that gorgeous golden latch and piano hinges to do modders, this is a part where PDP slammed their foot down and said "we do NOT want people tinkering with this." The poor plexiglass didn't exactly survive the removal process, either...


It had it's revenge though-- my hands were wounded in 3 different spots during this whole ordeal!


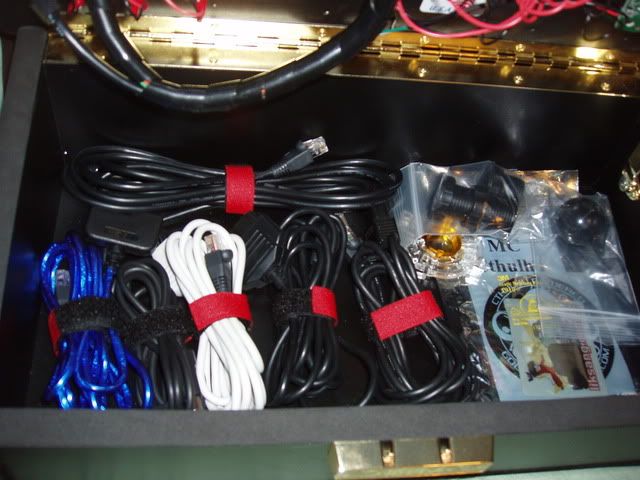
Now that that's out of the way, the next step will be to remove all that wretched carpet tape from the control panel. I will keep you guys posted as I make more progress on this mod. Don't worry, sweet plexiglass-- you shall not have died in vain!
 
It takes some nutz to rip out everything and try and do something different then the norm' so hats off to you my friend and best of luck on the project. Ill be keeping an eye on this thread with every update.
 
So you paid $130 for a box?
Actually, I payed $120 and it included a copy of MK9 brand new. And it's not just any box-- this thing is laminated, has piano hinges, and has that custom lock that I find to be 100% awesome. It all works out to be cheaper than getting a custom from Arcade-in-a-box. People pay a lot more to get their hands on Madcatz TE sticks even though the only thing they end up using is the stick enclosure, too. The PDP TE case is much higher quality than the Madcatz TE (which is just made of plastic), however the catch is that it's only good for Mortal Kombat and American style parts (which I actually had a preference for for many years, but I have gradually started to shift towards Sanwa and Seimitsu). Obviously, the Madcatz TE is a lot more travel friendly, however the TE can't be beat as far as sturdiness goes, and having your writsts higher up feels more natural.

Anyway, I managed to get all that nasty carpet tape stuff off. It took a lot of WD-40, napkins, isopropyl, and sore thumbs, but I was finally able to remove all of it. I'm actually pretty lucky that PDP actually bothered to laminate the topside of this panel, because if they had put this tape stuff directly onto the MDF it probably would have torn off some of the MDF when I tried to remove it-- not to menton that cleaning chemicals would have been out of the question, since the MDF would have soaked them up.


The next step involves power tools, so that will be fun.
 
I've made more progress today. I cut out a prototype control panel of cheap particle board and have it temporarily attached to me TE. I need to take some more precise measurements of the screw holes on the official control panel because not all of mine are lined up correctly, and the latch for the lock is currently misaligned so it won't lock. I am also probably going to switch to a drill press when I go to make the real thing to ensure that none of the holes are crooked. I'll be using higher quality lumber, too-- particle board is dirt cheap, but it's crappy and not very durable, which is why I am only using it for testing. I will be using AC Fir plywood on the final product, which is lighter than MDF but just as strong. Anyway, here are some pictures of the prototype. I sloppily drilled some Vewlix-style button holes into it just so you guys could get some idea of the possibilities.


Once my construction process has been perfected I'll probably be selling a variety of custom panels, just to give you guys a heads up. ;)
I would def be interested in one depending on how the end product turns out.
 
Not much of an update today, but I do have some news on the project. Last night I put together a template for the screw holes in illustrator, and spent several hours tweaking and checking it against the official PDP panel. I was going to cut out and drill another panel today, however the weather is not being cooperative so either I will have to wait until the sun comes out, or work out of the basement and clean up afterwards.

Also, while my plan was originally to drill a hole for a Switchcraft RJ45 jack on the case's main body, I have found a much cleaner solution. I recalled buying some screw-in USB extension cables that I bought for my Mame arcade machine a while back, and wondered if something like that could fit horizontally into a control panel. I looked around and found a RJ45 screw-in extension cable online, which I can probably mount on the side of the panel, allowing the RJ45 to clip into place on the panel the same way the USB cable on the official PDP panel does.


http://www.frontx.com/store/order_p.html

The one catch is that the casing on the jack makes it a bit thicker than the panel I am using (I'm using 5/8" lumber as opposed to the stock 3/4" that PDP uses), but I can overcome this by trimming off a bit of the casing with a box cutter, allowing it to mount flush with the rest of the panel. This should also work with screw-mount USB A to B cables, too, and USB A to B is pretty much the standard USB cable for custom sticks. As long as the casing material is soft enough for a sharp knife to cut it, this should be a very easy solution that requires no drilling into the main case at all. My USB extension cables are the same brand and use fairly soft material, so I don't expect this will be an issue.
 
Quick update: after hours of tweaking and checking my screw hole map in Adobe Illustrator, I've cut out a panel of AC fir and drilled in screw holes using my precision technique. For the ultimate test, I attached it to my PDP case and screwed everything into place. I didn't get to do any routing today so I couldn't attach the lock piece, but the results so far have been very pleasing! The AC fir is worlds better than the particle board as far as quality, looks, and easiness to work with goes, and it is lighter than the stock MDF panel which makes opening the case easier. Although when it's finished I'm going to laminate the underside, if I'm going to be selling these panels I will probably offer the option to leave it bare so that it can be stained and varnished, because that would look killer. The with my latest screw map and my precision drilling technique, the screws all lined up well enough for me to screw everything cleanly into place without trouble, so I do not forsee any problems popping up there.

The one change I'll probably make is to get some 1/2" gold screws from the hardware store, since this material is 1/8" thinner and one of the 5/8" screws on the piano hinges is poking out ever so slightly, which would be a problem when I put the artwork and plexiglass on unless I use a shorter screw or clip the ends off of some of the stock ones.


Tomorrow, I'm going to remove all the screws again and start routing, and hopefully I'll be able to order some of the parts I want.
 
It's been a while since my last update, but I have made a LOT of progress! After putting a few more hours into cutting the panel and the plexiglass, I got my artwork printed up and cut out and started putting everything together! I still need to get buttons, a bat-top and a Cthulhu MC for it along with a few other parts, but aside from that and the wiring, the serious legwork on this mod is pretty much done.


I actually managed to install an Xbox Live headset jack through the T-molding and wood! I also installed an RJ-45 port on the back of the panel, where the USB cable would be on the stock panel. Like the Xbox Live headset jack, I cut a hole in the T-molding to access it to keep everything on the outside nice and clean looking.


I am hoping that my next major update will feature this thing up and running! Also, I hope to be able to announce the availability of my custom panel service soon. This has been quite a learning experience, and I am having a lot of fun! :)
 

Jamison

Noob
huh...SF layout...
No disrespect, but you did all that mod work to have a SF button config??? To top it off it still has the signature MK latch and wire casing??? My whole reason to get the PDP stick in the first place was because it HAD the MK button layout. I guess to each their own. On a positive note it looks awesome, you are truly skilled, I would have never been able to do what you just did.
 

John Grizzly

The axe that clears the forest
Great looking stick so far, man.

As far as the MK layout, I don't use it anymore anyway, personally. I mean, what do you guys use for where the run button was? Flip? Throw? I have a 6 button layout with the block and flip in the middle between the 1+3 and 2+4. I use 1+3 to throw. I'm mainly a Tekken player so it's natural for me to throw that way. Furthermore, I'm sure a lot of you guys play other fighters, right? The MK layout is horrendous for other fighters. I wouldn't want to put all that time into a stick that I could only use for one game, even if it was the game I play the most.
 

lazybird123

Purple Belt in BJJ, White Belt in MK
Wow, now that is bad ass, I also disagreed with you changing it to the SF design until I saw that. Props man, I wish I was that handy/talented
 

Johnny2d

Xbl: Johnny2Die
This was really helpful. I'm thinking of either modding my PDP stick, or starting from scratch and building a new one, I also have an old UMK3 machine and am looking to restore it. I have a couple questions, 1. where can one purchase custom pieces of cut acrylic or plexi glass? Or, do you have access to those materials and are cutting and drilling them yourself? 2. What is the black edge protector called that you are using around the edges of the wood, my arcade cabinet has it too but it is so old and falling off, getting my hands on some new stuff would make my old arcade look a lot better.
 
I buy my sheet acrylic from a local glass supplier. Glass suppliers aren't that hard to find, although if you look one up make sure you call first to check their selection, and find out if they prefer customers to order ahead-- especially if you need it cut down to a smaller size. I buy the plexi in a slightly larger sheet than what I know I will need and then cut it down to size using a flush-trim router bit so that I know everything is going to line up properly, and I only use a drill on the plexi to make pilot holes. The plastic on the edge of the panel is called T-molding, and to install it you will need a special slot cutting router bit. They sell both the T-molding and router bit at T-molding.com.
 
I still need a few more parts before I can finish this thing, but externall it's pretty much done, even though it does not actually do anything yet. I thought I'd share some new pics with you all.


Here's another quick look at the RJ-45 jack on the back of the panel, whch also demonstrates how shiny it all is:


And another closeup of the Xbox Live headset jack:


Here's a look at the inside. The routing around the buttons is a little bit rough since I didn't have a rabbet bit, when I'm doing these for other people I'm going to pick one up so those areas will look a lot cleaner. As you can see I've already run the necessary wires for the XBL headset jack through the inside of the panel. There are also screwholes for the plastic shell, however I haven't bothered putting it back on yet since I'll just have to unscrew it once I start wiring this thing up.


Some business announcements (finally!):

I'm going to be taking orders on custom panels very soon. I am thinking my introductory price will be about $35-40 for the first six or so units (which includes plexiglass), although it may go up depending on how quickly those will sell. I'm going to be cutting out some more panels in the upcoming days that will have some different layouts so that buyers can get some idea of what kind of options will be available (they will go up for sale, too). I also plan to make carriage bolts be an option if people want to use snap-in buttons. These things will be made-to-order and I'm going to have a good variety of layouts available to choose from. I may handle transactions through either eBay or Etsy if people are more comfortable doing it that way than just email and PayPal.