


CrazyFingers
The Power of Lame Compels You
On Your Knees!-A Sun God Guide
Hello everyone! I figured since my Leatherface guide got a lot of good reviews
(shameless plug https://testyourmight.com/threads/search-for-the-perfect-chili-killer-butcher-guide-completed.61356/) I thought why not do another guide on a character that has a small, but somewhat vocal-ish, community! Enter Sun God. This is definitely one of the most fun characters I’ve played in this game and while I haven’t play this variation specifically in a while, all of Kotal’s mind games/tech is still fresh in my head, both universal and Sun God specific. So without further ado, here’s the Sun God! Up The Stair Path!
WAR CODEX
CHARACTER ARCHETYPE
Sun God Kotal Kahn is a grappler in the NRS style, which consists of plenty of staggered strings and tick throws. You will use your fast, advancing mids, tick throws and high damage to overwhelm your opponent and destroy them entirely, forcing them to scream for mercy while on their knees! But be warned! This comes with the need to be completely unpredictable in your actions. You must be fast and relentless, make the reads, get inside your opponent's head and show. no. mercy!
NOTABLE TOOLS
This section will cover Kotal Kahn's notable normals, strings and specials that you'll be using to maneuver your way around the screen and begin your pressure. These will be essential on your quest to make ALL the weaklings' souls burn!
NORMALS
Kotal Kahn's normals are the source of many a frustration from non-Kotal players due to the fact that he has some of the best buttons in the entirety of the game, possibly the SINGLE best in the game! He uses these fast, advancing normals to close the gap quickly, and start the pressure.
D1-6f
Height ~ Mid
Block Frames ~ -5
Hit Frames ~ +14
Guarantees on Hit
S1-10f
Height ~ Mid
Block Frames ~ +2
Hit Frames ~ +10
Guarantees on Hit
B1-9f
Height ~ Mid
Block Frames ~ -2
Hit Frames ~ +15
Guarantees on Hit
F1-11f
Height ~ Mid
Block Frames ~ -6
Hit Frames ~ +6
Guarantees on Hit
S2-11f
Height ~ High
Block Frames ~ +2
Hit Frames ~ +16
Guarantees on Hit
F2-18f
Height ~ Mid
Block Frames ~ -12
Hit Frames ~ +59
Guarantees on Hit
NOTE: IF YOU WANT TO KNOW WHEN TO BE CAREFUL OR MAYBE YOU'RE A NON KOTAL MAIN LOOKING FOR WAYS TO PUNISH F2, CHECK THIS LINK OUT https://testyourmight.com/threads/f2-safety-list.52763/
D3-7f
Height ~ Low
Block Frames ~ -6
Hit Frames ~ +10
Guarantees on Hit
D4-6f
Height ~ Low
Block Frames ~ -10
Hit Frames ~ +13
Guarantees on Hit
B4-16f
Height ~ Low
Block Frames ~ -8
Hit Frames ~ +20
Guarantees on Hit
F4-23f
Height ~ Mid
Block Frames ~ +9
Hit Frames ~ +34
Guarantees on Hit
STRINGS
Kotal Kahn's strings are just as important as his normals, being able to be canceled into powerful special abilities to increase + frames and continue his pressure. This section will not be as long as the normals section as less strings are useful in comparison to the number of useful normals. Let's begin!
114- High, Mid, Mid
Block Frames ~ +1
Hit Frames ~ +37
Breakdown: 114 is one of the two main pressure strings Kotal will use to assert his dominance in a match. Without canceling anything the string is relatively good. Decent startup on S1 and being +1 is, in itself, a decent string. However, when canceled into certain specials, it can become even more plus and then it leads to frame traps galore. Very strong string, you'll use it a lot.
B122- Mid, Mid, Overhead
Block Frames ~ -10
Hit Frames ~ +26
Breakdown: B122 is the second pressure string of the two you'll be using predominantly in the game. Its starter is your best normal, B1, and it is essential for looping frame traps. you will be using this string a lot as well, so get used to it.
B14- Mid, Low
Block Frames ~ -17
Hit Frames ~ +5
Breakdown: B14 is, for the most part, a combo starter and ender. In the corner is where you'll use this the most outside of combos, due to it being a combo starter with EX DF3. Use this and make sure to hit confirm it into EX DF3 in the corner and cancel into air throw on block (explanation for this in the "Block Strings" section)
F12, Mid, Mid
Block Frames ~ -6
Hit Frames ~ +40
Breakdown: F12 is string that you can basically just throw out whenever you KNOW the opponent will be block. While it is -6 on block, it's practically plus due to the intense push back it has. This push back will put you in range for all your pokes, which can be used to your advantage quite heavily. On hit, you can start sun bathing.
21, High, Mid/212, High, Mid, Overhead
Block Frames ~ -2/-1
Hit Frames ~ +13/+29
Breakdown: 21 and 212 are basically hand in hand. You can't talk about one without the other because, well there really isn't much of a gap between the two as far as usage. These two strings are fairly reliable and safe stagger strings. Usually I'd talk about them in the stagger strings section but that's literally all they are there for. No more, no less, on hit of 212 you get a free sun bathe.
SPECIALS
Here we will talk about Kotal Kahn's plethora of special moves and how he uses them. Kotal Kahn is one of the few characters where EVERY SINGLE special move is useful in one way or another and you will be using all of them in every game, except for like maybe one. He makes use of everything in his arsenal, and so should you! However, since there are so many I will only mention the ones that are 100% vital to know about when it comes to Sun God. Some moves, such as Sun Rays, are more useful in other variations. So without further ado! Here we go!
Air Take Down (DF1)
Usage: Frame Traps/Combos/Anti-Air
Breakdown: Air Take down is possibly the most important move in Kotal's repertoire. This is used on block to create a frame trap with 114, more on that later in the guide, is used for his short meterless combos that while they don't do a lot, can still add up, it can also catch enemies out of the air from moves such as Goro's stomp and Takeda's teleport.
EX VERSION
When this move is enhanced it gains new properties. It now will pop up enemies for a combo upon their impact with the ground. This is the version that will usually fill out your combos to extend them and get the massive amount of damage that the Osh-tek Emperor is known for, it can also be used for anti-airs, but using this version will guarantee you do a lot more with that anti-air.
Sunstone (DF3)
Usage: Frame Traps/Combos/Light Space Control
Breakdown: Kotal Kahn throws a giant slab of stone, seemingly spawned by the power of the sun itself! This disk hits hard but has an absurdly slow startup. You will only see this version in niche situations such as being full screen against a character with no projectile/teleport.
EX VERSION
Enhancing this moves causes it to launch the opponent, causing them to be air born. This variation is +15 on block and is much faster than its meterless cousin. You will see this being used to cause frame trap and start combos in the corner.
Sun God Choke (DB2)
Usage: Combo Ender/Command Grab
Breakdown: This is Sun God's biggest tool and most familiar to someone who doesn't know much of the character. The Sun God picks you up and proceeds to do a series of blows to you. However, this doesn't happen for free. Sun God Choke has 3 Levels to it and whenever you use it on your opponent, it gains a level and does more damage. At Lvl 1 it will do minimal damage with only okay hit advantage and it will side switch. At Lvl 2, the command grab does more damage, has more hit advantage and still side switches. Lvl 3 command grab does the most damage and will throw the opponent full screen without triggering a side switch, this level has less hit advantage than Lvl 2 but puts them at a further distance.
EX VERSION
Spending a bar on this move will simply add armor to it. It's a simple change but it allows you to have a fairly good defensive tool in your arsenal. Not a crazy adjustment, but still vital to have, also when you meterburn Sun God Choke, it will now combo on hit with any move, making it a sort of cushion for your tick throws, and you have the meter to spare so why not have a bit of safety.
Soul Scorch (FDB1)
Usage: Frame Traps/Meter Build/Healing
Breakdown: This is a Sun God specific special move that upon usage will absorb all your current charges for your command grab and give you meter based upon which level you were on. In order to use this move you must have empty meter available and have at least Lvl 1 Command Grab. On block it can be used to make yourself plus in combination with 114.
EX VERSION
When you spend meter on this move it goes from giving meter based upon your command grab's level to giving you health based upon it. Something you will notice with Sun God is that he is fairly good at building meter and that you will have plenty to spare. Basically just do this whenever you want a little bit of health and you'll be just that much harder to kill!
Soul Spark (FDB3)
Usage: Grab Lvl Build/Meter Build
Breakdown: This is Kotal's other Sun God specific FDB motion special. Instead of giving him meter or health, this special will instantly add a level to his command grab. You will use this with SOME block strings but mostly on knockdowns plus enough to squeeze one in, a method I refer to as 'Sun Bathing'. Both accurate and clever on my part if I do say so myself!
EX VERSION
When this move is enhanced it will immediately bring you to maximum level command grab. Useful if you are trying to make the final push and you need the damage from the fully leveled command grab, but other than that I don't use it all too often as levels are easy to come by for free.
Mace Parry (DF2)
Usage: Swagging Out on Fools
Breakdown: Mace parry is the single hypest move in the entire game. Upon getting hit, if you parry at the exact moment the hit would connect, the hit will be absorbed. This can be canceled into another parry for multiple hits in a row. If you pull this off, you will look like the coolest person in the room for sure. It can also be used for parrying projectiles and things of the like. Mace Parry is 7f and is one of my favorite moves in the game for good reason.
EX VERSION
This is when your parry goes super saiyan. It becomes a 1f parry and allows you to go ballistic with parrying and also allows you to create some of the hypest game moments you'll ever have, which can include parrying a full punchwalk on a read (one day I'll do this...that day will be glorious) Keep in mind that the 7f parry can do this as well but it is a tighter window and if you want to get good at parry timings, lab the absolute crap out of it, it's the only way to get good at it!
STAGGER PRESSURE
Stagger pressure is what Kotal Kahn is all about. You will use your staggers to get into your enemy's head. Make them think twice about letting go of block and once they are holding block for way too long, you will lash out at them and proceed to burn their soul! Here we will talk about what you will do when a normal is block, when a normal hits, and what to do when your opponent truly fears you and begins to block for most of the match.
B1/B122 Pressure
This stagger is something that you will probably use a hell of a lot. This normal is fairly advantageous on block, making the next step almost entirely up to you when it lands and on block it's only -2 which means you can stagger it to an effective amount. When you land a hit with B1 by itself, you can either go for another B1, go for a low poke or start S1/S2 pressure. If your opponent seems to be poking out of B1 right after they block it, be sure to complete the string and get that free level of command grab from B122 xx DB2!
S1/S114 Pressure
This is the stagger that you will begin to use once you have achieved a certain level of respect from the opponent. S1 is +2 on block and has decent range, but is a high, which means people can mash low pokes out of it. However! Once you land a S1 on block you are free to throw out your B1. While it's not guaranteed, the move does come out in about 7f after S1 due to the plus frames, which makes it pretty good for block pressure. Once your opponent has blocked one or two S1's in a row, be sure to finish the string and go for your frame traps.
S2/S21/S212 "The Unsung Hero"
Ok so whenever I see Sun God played on streams and such, I NEVER see this stagger used. It could be because it doesn't tick throw but I feel like on Sun God in particular this stagger is a monstrous tool that should be exploited to its full potential. S2 can start being used around the same time S1 starts to be used. It is +2 on block and actually looks fairly similar to S1 and has the same range. The only differences? Slower and has a larger amount of hit advantage and push back on hit. These two in conjunction with one another is what makes the S2 such a scary normal to me. When S2 connects with someone's face, they are at the perfect range for B1, D4, F1 and with a short run (VERY short, be sure to practice the short run after S2 to make sure you get the most out of your frames) you can S2 again, S1 or D1/D3. This normal puts you in the perfect position to do what you want to do. S21 will do the same thing with slightly less pushback and hit advantage and S212 will result in a hard knockdown that's plus enough for some sun bathing.
TICK THROWS
This section will go over one of Sun God's biggest tools, that being tick throws obviously. A Tick throw is when you do a normal/string on block and cancel into a command grab, but the command grab will connect. Usually when you cancel strings/normals on block you get a whiff animation for the grab, however, tick throws as mentioned before will connect. Keep in mind that if the opponent knows you will tick throw they can jump out or armored through.
B1/B14
These two tick throws are fairly similar in usage. When tick throwing with back one, you want to be using that in conjunction with B122 pressure, AKA frame traps involving 114 into B122 or frame traps involving B122 canceled into EX Sunstone. They are also good when used with B1 staggers. B14 can be used in a similar way but I suggest using B14 only really in the corner, and not for tick throws as it serves its purpose as a combo starter in the corner better than being a tick throw.
S1
Similar to B1 tick throws, this tick throw will be used when frame trapping the opponent. Usually opponents will expect you to use the full string when looping your frame traps, which makes S1 a fairly scary button because you very well could just decide to tick throw your opponent and make them kneel!
D1/D4/D3/JiK's
I bunched all of these together because they are all things you will possibly be doing when there is a pause and you are waiting for the opponent to make his/her next move or when you want to make your move. D4 is a great tick throw for when your opponent has been hit/blocks something with a decent amount of pushback and are in perfect range for D4 to become blocked. D1 and D3 go hand in hand as they have about the same range. When using D1 has a tick throw, if your opponent has the tendency to just jump out of D1 tick throws, be sure to NJP after D1 if you want to try and catch the jump and punish them for a decent chunk of damage. Jump Back 1 or Jump Forward one will catch Jump Forwards and Jump Backs from the opponent. JiK tick throws are really just there to catch your opponent off card and make them a bit scared of your already scary jump ins. If they always jump after JiK's, be sure to do JiK B1, B12 into EX Air Takedown for a full combo or just cancel into choke for some nice free meterless damage.
FOR OTHER WAYS TO COUNTER JUMPING OUT OF TICK THROWS, CHECK THIS VIDEO OUT. I DO NOT TAKE CREDIT FOR IT BUT IT IS FAIRLY USEFUL.
WHENEVER HE USES S12, USE B14 MOST OF THE TIME INSTEAD, THE VIDEO IS A BIT OLD BUT STILL APPLICABLE.
BLOCK STRINGS
Kotal Kahn has many things he will be doing on block, it's a big part of who he is. Relentless and covered in frame traps. These block strings come with strengths and weaknesses, so let's get into the thick of it.
114 xx DF1
Frame Data~+4
Breakdown: This is Kotal Kahn's best block string and is used CONSTANTLY in his game plan. Leaving Kotal Kahn +4 not only means that all of his pokes are guaranteed, it also makes B1 come out in 5 frames and S1 come out in 6 frames. Most buttons cannot come out before these without AT LEAST trading but as long as your timing is good, nothing short of armor or a fast parry will beat you out, abuse this when you can.
114 xx FDB1
Frame Data~ +5/+6
Breakdown: This is one of the reasons FDB1 is so important for this character. Canceling into this on block with 114 makes you even MORE plus than with DF1. I know for a fact it's at least +5, but it might be +6, I will update this when I know for sure its exact frame data. But abuse this! It gets you meter and makes you even more plus thant your normal frame trap.
114 xx FDB3
Frame Data~-8
Breakdown: This block string is to be used sparingly, but is to not be forgotten. Being -8 means it can be punished by a decent amount of jabs but the punish is a bit tight, not THAT tight but tight enough to have some comfort ability in using this block string. Don't use it too much, but always good to keep in mind your tools.
B122 xx DF1
Frame Data~ -8
Breakdown: This is an example of DF1 not making you plus, but it makes you a lot safe. This string is normally -10, which is punishable by a lot of the cast, however, -8 is MUCH safer, and a bit harder to punish so keep this in mind and make sure to use it when they block.
B122 xx Ex DF3
Frame Data~ +15
Breakdown: Another string you will see a lot but don't overuse it, for it has its own issues. There is a gap between B122 and Ex DF3 which can be armored through and poked out of if the opponent has practiced that enough, it's a bit of a tight window but if they practice enough they will get out of it. In the corner it can be backdashed but otherwise it can't be. The risk however, is worth the reward due to this doing a decent amount of chip and leaving you at a monstrous amount of plus frames. After you land a B122 xx Ex DF3, you will start your frame trap loop, which will be explained at the end of this section.
FRAME TRAP LOOP
INPUT: 114 xx DF1, B122 xx EX DF3, run. 114 xx DF1 (Rinse Repeat)
BREAKDOWN: This is a pressuring loop is something you will see a lot when seeing Kotal Kahn do his thing. There are issues with this loop but the reward is just to large for you not to make use of it. During this loop, you have tons of options during the loop, beginning the loop and ending the loop. So, I will go over your options during the whole loop.
BEGINNING THE LOOP
When you begin this loop, it could end as soon as it began! 114 xx DF1 will guarantee your B1 for the loop however, S1 can tick throw and B1 can tick throw as well. So your opponent very well could just get tagged by a tick throw or get tagged by entire strings, fairly strong, but it gets better.
IN THE MIDDLE OF THE LOOP
The middle of the loop is basically in between EX DF3 and the run you do when that connects. There you can do basically anything. Low pokes can catch the opponent off card and leave you plus on hit. You could run up and tick throw with ANY of your tick throws. Run up raw command grab can catch a lot of people off guard. Or you can simply start the cycle again.
AT THE END OF THE LOOP
The end of the loop is basically just 114 xx DF1. Very similar to the start of the loop, this point in the loop is where you probably have less meter and don't want to use all of it on this loop. All your options still remain, B1, S1, Low Pokes, etc, but the end of the loop is different to the beginning in a big way, and that is, the opponent doesn't know the loop is ending, you're the only one with that information. So, using that information, you can try and read what the opponent will do in response to the loop possibly continuing. So for example, B122, the opponent might expect you to do your sun stone and try to counter with armor or a poke. If armor, you might be able to get a punish but if it's a fast poke, you can counter with your own poke or armored command grab. This mind game can be vital to securing a win.
KNOCKDOWN GAME
On knockdown, Sun God gets a couple of things. He can get free levels of grab, he can setup meaties with things like B122 and things like that. So here is what you will be wanting to do on certain knockdowns from certain things. Let's go!
What Is Sun Bathing?
Sun Bathing, as mentioned earlier, is using FDB3/FDB1 on a knockdown for free so gain more off of your knockdowns. This technique is, in my opinion, vital to getting the most out of your hits with Sun God.
Sun God Choke
Breakdown: Sun God choke has different levels of hit advantage going from decent to intense to decent again. On level 1 and 3 you will get the least amount of hit advantage but on level 2, you get more. Level 2 guarantees a FDB3 while Level 3 can sometimes get you one, depending on what the opponent can do to try and stop you from doing that at full screen. If you don't want to do some sun bathing, simply do a meaty string into pressure and feel good about it.
EX Sun Disk
Breakdown: Ex Sun Disk on hit is a ton of + frames and guarantees pretty much anything you want. From Sun Bathing to standing back and healing up from Sun Ray. You can also use this to start pushing the opponent to the corner. where Sun God happens to do fairly scary things.
F12 and Knockdowns Like it
Breakdown: This kind of knockdown is decently numerous among our arsenal, so I will simply go over this string and the knockdowns similar to it. On things like this, you will get basically the same things you get from EX Sun Disk, and you will be glad to reap the benefits of this connecting. Strings that also have these sort of lengthy knockdowns include B32 and 212.
MEATY NJK'S IN THE CORNER
Kotal Kahn has a beastly NJK, in a similar fashion to Predator and Sub-Zero. If you time it correctly, your NJK will be meaty, which has tons of knockback and leaves you fairly plus. On block, it will do the things mentioned but on hit it leaves them knocked down and allows you to continue the pressure. Be sure to use this tool when you think they will either hold block on wakeup or mash buttons.
GODLY MARTIAL ARTS
HERE IS WHAT YOU HAVE BEEN WAITING FOR! THE TOOLS YOU WILL NEED TO DEFEAT YOUR ENEMY AND BURN THEIR SOULS!
METERLESS
MIDSCREEN
F2, F2, F2, B14 xx DB2
(Lvl 1: 33%/ Lvl 2: 36%/ Lvl 3: 38%)
B122 xx DB2
(Lvl 1: 20%/ Lvl 2: 23%/ Lvl 3: 26%)
F1B2, F1B2, F1B2 xx DB2
(Lvl 1: 23%/ Lvl 2: 25%/ Lvl 3: 28%)
114 xx DB2
(Lvl 1: 20%/ Lvl 2: 23%/ Lvl 3: 27%)
CORNER
F2, F2, F2, B122 xx DB2
(Lvl 1: 36%/ Lvl 2: 38%/ Lvl 3: 40%)
F1B2, F1B2, D1, 114 xx DB2
(Lvl 1: 26%/ Lvl 2: 28%/ Lvl 3: 31%)
METERED
MIDSCREEN
F2, F2, F2, B14 xx EX DF1, B14 xx DB2
(Lvl 1: 43%/ Lvl 2: 45%/ Lvl 3: 47%)
B12 xx EX DF1, F2, B14 xx DB2
(Lvl 1: 34%/ Lvl 2: 37%/ Lvl 3: 40%)
114 xx EX DF1, F2, B14 xx DB2
(Lvl 1: 40%/ Lvl 2: 42%/ Lvl 3: 46%)
B14 xx EX DB2
(Lvl 1: 17%/ Lvl 2: 20%/ Lvl 3: 25%)
F1B2 xx EX DF1, F2, B14 xx DB2
(Lvl 1: 33%/ Lvl 2: 35%/ Lvl 3: 38%)
CORNER (1 BAR)
F2, F2, F2, B122 xx EX DF1, B14 xx DB2
(Lvl 1: 44%/ Lvl 2: 46%/ Lvl 3: 48%)
B14 xx EX DF3, D1, D1, D1, B122 xx DB2
(Lvl 1: 42%/ Lvl 2: 44%/ Lvl 3: 47%)
114 xx EX DF3, D1, D1, B122 xx DB2
(Lvl 1: 43%/ Lvl 2: 45%/ Lvl 3: 48%)
B122 xx EX DF3, B122 xx DB2
(Lvl 1: 39%/ Lvl 2: 41%/ Lvl 3: 44%)
CORNER (2 BAR)
B14 xx EX DF3, D1, F1B2, D1 xx DB2
(Lvl 1: 48%/ Lvl 2: 50%/ Lvl 3: 53%) (Props to @Mr Aquaman for being the reason I know about this combo, swaggy as hell)
B14 xx EX DF3, B14 xx EX DF1, F2, B14 xx DB2
(Lvl 1: 52%/ Lvl 2: 54%/ Lvl 3: 58%)
B122 xx EX DF3, B122 xx EX DF1, B14 xx DB2
(Lvl 1: 49%/ Lvl 2: 51%/ Lvl 3: 54%)
114 xx EX DF3, D1, D1, B122 xx EX DF1, B14 xx DB2
(Lvl 1: 53%/ Lvl 2: 55%/ Lvl 3: 58%)
I LEAVE YOU WITH THESE WORDS! SPOKEN FROM THE SUN GOD HIMSELF!

ENJOY THE GUIDE!
Hello everyone! I figured since my Leatherface guide got a lot of good reviews
(shameless plug https://testyourmight.com/threads/search-for-the-perfect-chili-killer-butcher-guide-completed.61356/) I thought why not do another guide on a character that has a small, but somewhat vocal-ish, community! Enter Sun God. This is definitely one of the most fun characters I’ve played in this game and while I haven’t play this variation specifically in a while, all of Kotal’s mind games/tech is still fresh in my head, both universal and Sun God specific. So without further ado, here’s the Sun God! Up The Stair Path!
WAR CODEX
- CHARACTER ARCHETYPE
- NOTABLE TOOLS
- NORMALS
- STRINGS
- SPECIALS
- STAGGER PRESSURE
- TICK THROWS
- BLOCK STRINGS
- KNOCKDOWN GAME
- GODLY MARTIAL ARTS
- METERLESS
- METERED
- AIR TO AIRS
- CORNER
- METERLESS
- METERED
CHARACTER ARCHETYPE
Sun God Kotal Kahn is a grappler in the NRS style, which consists of plenty of staggered strings and tick throws. You will use your fast, advancing mids, tick throws and high damage to overwhelm your opponent and destroy them entirely, forcing them to scream for mercy while on their knees! But be warned! This comes with the need to be completely unpredictable in your actions. You must be fast and relentless, make the reads, get inside your opponent's head and show. no. mercy!
NOTABLE TOOLS
This section will cover Kotal Kahn's notable normals, strings and specials that you'll be using to maneuver your way around the screen and begin your pressure. These will be essential on your quest to make ALL the weaklings' souls burn!
NORMALS
Kotal Kahn's normals are the source of many a frustration from non-Kotal players due to the fact that he has some of the best buttons in the entirety of the game, possibly the SINGLE best in the game! He uses these fast, advancing normals to close the gap quickly, and start the pressure.
D1-6f
Height ~ Mid
Block Frames ~ -5
Hit Frames ~ +14
Guarantees on Hit
- B1
- S1
- F1
- D1
- S2
- D3
- D4
S1-10f
Height ~ Mid
Block Frames ~ +2
Hit Frames ~ +10
Guarantees on Hit
- B1
- S1
- D1
- D3
- D4
B1-9f
Height ~ Mid
Block Frames ~ -2
Hit Frames ~ +15
Guarantees on Hit
- B1
- S1
- F1
- D1
- S2
- D3
- D4
F1-11f
Height ~ Mid
Block Frames ~ -6
Hit Frames ~ +6
Guarantees on Hit
- D1
- D4
- D3
S2-11f
Height ~ High
Block Frames ~ +2
Hit Frames ~ +16
Guarantees on Hit
- D1
- S1
- B1
- F1
- S2
- D3
- B4
- D4
F2-18f
Height ~ Mid
Block Frames ~ -12
Hit Frames ~ +59
Guarantees on Hit
- FULL COMBO
NOTE: IF YOU WANT TO KNOW WHEN TO BE CAREFUL OR MAYBE YOU'RE A NON KOTAL MAIN LOOKING FOR WAYS TO PUNISH F2, CHECK THIS LINK OUT https://testyourmight.com/threads/f2-safety-list.52763/
D3-7f
Height ~ Low
Block Frames ~ -6
Hit Frames ~ +10
Guarantees on Hit
- D1
- S1
- B1
- D4
D4-6f
Height ~ Low
Block Frames ~ -10
Hit Frames ~ +13
Guarantees on Hit
- D1
- S1
- B1
- D4
B4-16f
Height ~ Low
Block Frames ~ -8
Hit Frames ~ +20
Guarantees on Hit
- MEATY TIME
F4-23f
Height ~ Mid
Block Frames ~ +9
Hit Frames ~ +34
Guarantees on Hit
- MEATY TIME/BATHE IN THE SUN
STRINGS
Kotal Kahn's strings are just as important as his normals, being able to be canceled into powerful special abilities to increase + frames and continue his pressure. This section will not be as long as the normals section as less strings are useful in comparison to the number of useful normals. Let's begin!
114- High, Mid, Mid
Block Frames ~ +1
Hit Frames ~ +37
Breakdown: 114 is one of the two main pressure strings Kotal will use to assert his dominance in a match. Without canceling anything the string is relatively good. Decent startup on S1 and being +1 is, in itself, a decent string. However, when canceled into certain specials, it can become even more plus and then it leads to frame traps galore. Very strong string, you'll use it a lot.
B122- Mid, Mid, Overhead
Block Frames ~ -10
Hit Frames ~ +26
Breakdown: B122 is the second pressure string of the two you'll be using predominantly in the game. Its starter is your best normal, B1, and it is essential for looping frame traps. you will be using this string a lot as well, so get used to it.
B14- Mid, Low
Block Frames ~ -17
Hit Frames ~ +5
Breakdown: B14 is, for the most part, a combo starter and ender. In the corner is where you'll use this the most outside of combos, due to it being a combo starter with EX DF3. Use this and make sure to hit confirm it into EX DF3 in the corner and cancel into air throw on block (explanation for this in the "Block Strings" section)
F12, Mid, Mid
Block Frames ~ -6
Hit Frames ~ +40
Breakdown: F12 is string that you can basically just throw out whenever you KNOW the opponent will be block. While it is -6 on block, it's practically plus due to the intense push back it has. This push back will put you in range for all your pokes, which can be used to your advantage quite heavily. On hit, you can start sun bathing.
21, High, Mid/212, High, Mid, Overhead
Block Frames ~ -2/-1
Hit Frames ~ +13/+29
Breakdown: 21 and 212 are basically hand in hand. You can't talk about one without the other because, well there really isn't much of a gap between the two as far as usage. These two strings are fairly reliable and safe stagger strings. Usually I'd talk about them in the stagger strings section but that's literally all they are there for. No more, no less, on hit of 212 you get a free sun bathe.
SPECIALS
Here we will talk about Kotal Kahn's plethora of special moves and how he uses them. Kotal Kahn is one of the few characters where EVERY SINGLE special move is useful in one way or another and you will be using all of them in every game, except for like maybe one. He makes use of everything in his arsenal, and so should you! However, since there are so many I will only mention the ones that are 100% vital to know about when it comes to Sun God. Some moves, such as Sun Rays, are more useful in other variations. So without further ado! Here we go!
Air Take Down (DF1)
Usage: Frame Traps/Combos/Anti-Air
Breakdown: Air Take down is possibly the most important move in Kotal's repertoire. This is used on block to create a frame trap with 114, more on that later in the guide, is used for his short meterless combos that while they don't do a lot, can still add up, it can also catch enemies out of the air from moves such as Goro's stomp and Takeda's teleport.
EX VERSION
When this move is enhanced it gains new properties. It now will pop up enemies for a combo upon their impact with the ground. This is the version that will usually fill out your combos to extend them and get the massive amount of damage that the Osh-tek Emperor is known for, it can also be used for anti-airs, but using this version will guarantee you do a lot more with that anti-air.
Sunstone (DF3)
Usage: Frame Traps/Combos/Light Space Control
Breakdown: Kotal Kahn throws a giant slab of stone, seemingly spawned by the power of the sun itself! This disk hits hard but has an absurdly slow startup. You will only see this version in niche situations such as being full screen against a character with no projectile/teleport.
EX VERSION
Enhancing this moves causes it to launch the opponent, causing them to be air born. This variation is +15 on block and is much faster than its meterless cousin. You will see this being used to cause frame trap and start combos in the corner.
Sun God Choke (DB2)
Usage: Combo Ender/Command Grab
Breakdown: This is Sun God's biggest tool and most familiar to someone who doesn't know much of the character. The Sun God picks you up and proceeds to do a series of blows to you. However, this doesn't happen for free. Sun God Choke has 3 Levels to it and whenever you use it on your opponent, it gains a level and does more damage. At Lvl 1 it will do minimal damage with only okay hit advantage and it will side switch. At Lvl 2, the command grab does more damage, has more hit advantage and still side switches. Lvl 3 command grab does the most damage and will throw the opponent full screen without triggering a side switch, this level has less hit advantage than Lvl 2 but puts them at a further distance.
EX VERSION
Spending a bar on this move will simply add armor to it. It's a simple change but it allows you to have a fairly good defensive tool in your arsenal. Not a crazy adjustment, but still vital to have, also when you meterburn Sun God Choke, it will now combo on hit with any move, making it a sort of cushion for your tick throws, and you have the meter to spare so why not have a bit of safety.
Soul Scorch (FDB1)
Usage: Frame Traps/Meter Build/Healing
Breakdown: This is a Sun God specific special move that upon usage will absorb all your current charges for your command grab and give you meter based upon which level you were on. In order to use this move you must have empty meter available and have at least Lvl 1 Command Grab. On block it can be used to make yourself plus in combination with 114.
EX VERSION
When you spend meter on this move it goes from giving meter based upon your command grab's level to giving you health based upon it. Something you will notice with Sun God is that he is fairly good at building meter and that you will have plenty to spare. Basically just do this whenever you want a little bit of health and you'll be just that much harder to kill!
Soul Spark (FDB3)
Usage: Grab Lvl Build/Meter Build
Breakdown: This is Kotal's other Sun God specific FDB motion special. Instead of giving him meter or health, this special will instantly add a level to his command grab. You will use this with SOME block strings but mostly on knockdowns plus enough to squeeze one in, a method I refer to as 'Sun Bathing'. Both accurate and clever on my part if I do say so myself!
EX VERSION
When this move is enhanced it will immediately bring you to maximum level command grab. Useful if you are trying to make the final push and you need the damage from the fully leveled command grab, but other than that I don't use it all too often as levels are easy to come by for free.
Mace Parry (DF2)
Usage: Swagging Out on Fools
Breakdown: Mace parry is the single hypest move in the entire game. Upon getting hit, if you parry at the exact moment the hit would connect, the hit will be absorbed. This can be canceled into another parry for multiple hits in a row. If you pull this off, you will look like the coolest person in the room for sure. It can also be used for parrying projectiles and things of the like. Mace Parry is 7f and is one of my favorite moves in the game for good reason.
EX VERSION
This is when your parry goes super saiyan. It becomes a 1f parry and allows you to go ballistic with parrying and also allows you to create some of the hypest game moments you'll ever have, which can include parrying a full punchwalk on a read (one day I'll do this...that day will be glorious) Keep in mind that the 7f parry can do this as well but it is a tighter window and if you want to get good at parry timings, lab the absolute crap out of it, it's the only way to get good at it!
STAGGER PRESSURE
Stagger pressure is what Kotal Kahn is all about. You will use your staggers to get into your enemy's head. Make them think twice about letting go of block and once they are holding block for way too long, you will lash out at them and proceed to burn their soul! Here we will talk about what you will do when a normal is block, when a normal hits, and what to do when your opponent truly fears you and begins to block for most of the match.
B1/B122 Pressure
This stagger is something that you will probably use a hell of a lot. This normal is fairly advantageous on block, making the next step almost entirely up to you when it lands and on block it's only -2 which means you can stagger it to an effective amount. When you land a hit with B1 by itself, you can either go for another B1, go for a low poke or start S1/S2 pressure. If your opponent seems to be poking out of B1 right after they block it, be sure to complete the string and get that free level of command grab from B122 xx DB2!
S1/S114 Pressure
This is the stagger that you will begin to use once you have achieved a certain level of respect from the opponent. S1 is +2 on block and has decent range, but is a high, which means people can mash low pokes out of it. However! Once you land a S1 on block you are free to throw out your B1. While it's not guaranteed, the move does come out in about 7f after S1 due to the plus frames, which makes it pretty good for block pressure. Once your opponent has blocked one or two S1's in a row, be sure to finish the string and go for your frame traps.
S2/S21/S212 "The Unsung Hero"
Ok so whenever I see Sun God played on streams and such, I NEVER see this stagger used. It could be because it doesn't tick throw but I feel like on Sun God in particular this stagger is a monstrous tool that should be exploited to its full potential. S2 can start being used around the same time S1 starts to be used. It is +2 on block and actually looks fairly similar to S1 and has the same range. The only differences? Slower and has a larger amount of hit advantage and push back on hit. These two in conjunction with one another is what makes the S2 such a scary normal to me. When S2 connects with someone's face, they are at the perfect range for B1, D4, F1 and with a short run (VERY short, be sure to practice the short run after S2 to make sure you get the most out of your frames) you can S2 again, S1 or D1/D3. This normal puts you in the perfect position to do what you want to do. S21 will do the same thing with slightly less pushback and hit advantage and S212 will result in a hard knockdown that's plus enough for some sun bathing.
TICK THROWS
This section will go over one of Sun God's biggest tools, that being tick throws obviously. A Tick throw is when you do a normal/string on block and cancel into a command grab, but the command grab will connect. Usually when you cancel strings/normals on block you get a whiff animation for the grab, however, tick throws as mentioned before will connect. Keep in mind that if the opponent knows you will tick throw they can jump out or armored through.
B1/B14
These two tick throws are fairly similar in usage. When tick throwing with back one, you want to be using that in conjunction with B122 pressure, AKA frame traps involving 114 into B122 or frame traps involving B122 canceled into EX Sunstone. They are also good when used with B1 staggers. B14 can be used in a similar way but I suggest using B14 only really in the corner, and not for tick throws as it serves its purpose as a combo starter in the corner better than being a tick throw.
S1
Similar to B1 tick throws, this tick throw will be used when frame trapping the opponent. Usually opponents will expect you to use the full string when looping your frame traps, which makes S1 a fairly scary button because you very well could just decide to tick throw your opponent and make them kneel!
D1/D4/D3/JiK's
I bunched all of these together because they are all things you will possibly be doing when there is a pause and you are waiting for the opponent to make his/her next move or when you want to make your move. D4 is a great tick throw for when your opponent has been hit/blocks something with a decent amount of pushback and are in perfect range for D4 to become blocked. D1 and D3 go hand in hand as they have about the same range. When using D1 has a tick throw, if your opponent has the tendency to just jump out of D1 tick throws, be sure to NJP after D1 if you want to try and catch the jump and punish them for a decent chunk of damage. Jump Back 1 or Jump Forward one will catch Jump Forwards and Jump Backs from the opponent. JiK tick throws are really just there to catch your opponent off card and make them a bit scared of your already scary jump ins. If they always jump after JiK's, be sure to do JiK B1, B12 into EX Air Takedown for a full combo or just cancel into choke for some nice free meterless damage.
FOR OTHER WAYS TO COUNTER JUMPING OUT OF TICK THROWS, CHECK THIS VIDEO OUT. I DO NOT TAKE CREDIT FOR IT BUT IT IS FAIRLY USEFUL.
WHENEVER HE USES S12, USE B14 MOST OF THE TIME INSTEAD, THE VIDEO IS A BIT OLD BUT STILL APPLICABLE.
BLOCK STRINGS
Kotal Kahn has many things he will be doing on block, it's a big part of who he is. Relentless and covered in frame traps. These block strings come with strengths and weaknesses, so let's get into the thick of it.
114 xx DF1
Frame Data~+4
Breakdown: This is Kotal Kahn's best block string and is used CONSTANTLY in his game plan. Leaving Kotal Kahn +4 not only means that all of his pokes are guaranteed, it also makes B1 come out in 5 frames and S1 come out in 6 frames. Most buttons cannot come out before these without AT LEAST trading but as long as your timing is good, nothing short of armor or a fast parry will beat you out, abuse this when you can.
114 xx FDB1
Frame Data~ +5/+6
Breakdown: This is one of the reasons FDB1 is so important for this character. Canceling into this on block with 114 makes you even MORE plus than with DF1. I know for a fact it's at least +5, but it might be +6, I will update this when I know for sure its exact frame data. But abuse this! It gets you meter and makes you even more plus thant your normal frame trap.
114 xx FDB3
Frame Data~-8
Breakdown: This block string is to be used sparingly, but is to not be forgotten. Being -8 means it can be punished by a decent amount of jabs but the punish is a bit tight, not THAT tight but tight enough to have some comfort ability in using this block string. Don't use it too much, but always good to keep in mind your tools.
B122 xx DF1
Frame Data~ -8
Breakdown: This is an example of DF1 not making you plus, but it makes you a lot safe. This string is normally -10, which is punishable by a lot of the cast, however, -8 is MUCH safer, and a bit harder to punish so keep this in mind and make sure to use it when they block.
B122 xx Ex DF3
Frame Data~ +15
Breakdown: Another string you will see a lot but don't overuse it, for it has its own issues. There is a gap between B122 and Ex DF3 which can be armored through and poked out of if the opponent has practiced that enough, it's a bit of a tight window but if they practice enough they will get out of it. In the corner it can be backdashed but otherwise it can't be. The risk however, is worth the reward due to this doing a decent amount of chip and leaving you at a monstrous amount of plus frames. After you land a B122 xx Ex DF3, you will start your frame trap loop, which will be explained at the end of this section.
FRAME TRAP LOOP
INPUT: 114 xx DF1, B122 xx EX DF3, run. 114 xx DF1 (Rinse Repeat)
BREAKDOWN: This is a pressuring loop is something you will see a lot when seeing Kotal Kahn do his thing. There are issues with this loop but the reward is just to large for you not to make use of it. During this loop, you have tons of options during the loop, beginning the loop and ending the loop. So, I will go over your options during the whole loop.
BEGINNING THE LOOP
When you begin this loop, it could end as soon as it began! 114 xx DF1 will guarantee your B1 for the loop however, S1 can tick throw and B1 can tick throw as well. So your opponent very well could just get tagged by a tick throw or get tagged by entire strings, fairly strong, but it gets better.
IN THE MIDDLE OF THE LOOP
The middle of the loop is basically in between EX DF3 and the run you do when that connects. There you can do basically anything. Low pokes can catch the opponent off card and leave you plus on hit. You could run up and tick throw with ANY of your tick throws. Run up raw command grab can catch a lot of people off guard. Or you can simply start the cycle again.
AT THE END OF THE LOOP
The end of the loop is basically just 114 xx DF1. Very similar to the start of the loop, this point in the loop is where you probably have less meter and don't want to use all of it on this loop. All your options still remain, B1, S1, Low Pokes, etc, but the end of the loop is different to the beginning in a big way, and that is, the opponent doesn't know the loop is ending, you're the only one with that information. So, using that information, you can try and read what the opponent will do in response to the loop possibly continuing. So for example, B122, the opponent might expect you to do your sun stone and try to counter with armor or a poke. If armor, you might be able to get a punish but if it's a fast poke, you can counter with your own poke or armored command grab. This mind game can be vital to securing a win.
KNOCKDOWN GAME
On knockdown, Sun God gets a couple of things. He can get free levels of grab, he can setup meaties with things like B122 and things like that. So here is what you will be wanting to do on certain knockdowns from certain things. Let's go!
What Is Sun Bathing?
Sun Bathing, as mentioned earlier, is using FDB3/FDB1 on a knockdown for free so gain more off of your knockdowns. This technique is, in my opinion, vital to getting the most out of your hits with Sun God.
Sun God Choke
Breakdown: Sun God choke has different levels of hit advantage going from decent to intense to decent again. On level 1 and 3 you will get the least amount of hit advantage but on level 2, you get more. Level 2 guarantees a FDB3 while Level 3 can sometimes get you one, depending on what the opponent can do to try and stop you from doing that at full screen. If you don't want to do some sun bathing, simply do a meaty string into pressure and feel good about it.
EX Sun Disk
Breakdown: Ex Sun Disk on hit is a ton of + frames and guarantees pretty much anything you want. From Sun Bathing to standing back and healing up from Sun Ray. You can also use this to start pushing the opponent to the corner. where Sun God happens to do fairly scary things.
F12 and Knockdowns Like it
Breakdown: This kind of knockdown is decently numerous among our arsenal, so I will simply go over this string and the knockdowns similar to it. On things like this, you will get basically the same things you get from EX Sun Disk, and you will be glad to reap the benefits of this connecting. Strings that also have these sort of lengthy knockdowns include B32 and 212.
MEATY NJK'S IN THE CORNER
Kotal Kahn has a beastly NJK, in a similar fashion to Predator and Sub-Zero. If you time it correctly, your NJK will be meaty, which has tons of knockback and leaves you fairly plus. On block, it will do the things mentioned but on hit it leaves them knocked down and allows you to continue the pressure. Be sure to use this tool when you think they will either hold block on wakeup or mash buttons.
GODLY MARTIAL ARTS
HERE IS WHAT YOU HAVE BEEN WAITING FOR! THE TOOLS YOU WILL NEED TO DEFEAT YOUR ENEMY AND BURN THEIR SOULS!
METERLESS
MIDSCREEN
F2, F2, F2, B14 xx DB2
(Lvl 1: 33%/ Lvl 2: 36%/ Lvl 3: 38%)
B122 xx DB2
(Lvl 1: 20%/ Lvl 2: 23%/ Lvl 3: 26%)
F1B2, F1B2, F1B2 xx DB2
(Lvl 1: 23%/ Lvl 2: 25%/ Lvl 3: 28%)
114 xx DB2
(Lvl 1: 20%/ Lvl 2: 23%/ Lvl 3: 27%)
CORNER
F2, F2, F2, B122 xx DB2
(Lvl 1: 36%/ Lvl 2: 38%/ Lvl 3: 40%)
F1B2, F1B2, D1, 114 xx DB2
(Lvl 1: 26%/ Lvl 2: 28%/ Lvl 3: 31%)
METERED
MIDSCREEN
F2, F2, F2, B14 xx EX DF1, B14 xx DB2
(Lvl 1: 43%/ Lvl 2: 45%/ Lvl 3: 47%)
B12 xx EX DF1, F2, B14 xx DB2
(Lvl 1: 34%/ Lvl 2: 37%/ Lvl 3: 40%)
114 xx EX DF1, F2, B14 xx DB2
(Lvl 1: 40%/ Lvl 2: 42%/ Lvl 3: 46%)
B14 xx EX DB2
(Lvl 1: 17%/ Lvl 2: 20%/ Lvl 3: 25%)
F1B2 xx EX DF1, F2, B14 xx DB2
(Lvl 1: 33%/ Lvl 2: 35%/ Lvl 3: 38%)
CORNER (1 BAR)
F2, F2, F2, B122 xx EX DF1, B14 xx DB2
(Lvl 1: 44%/ Lvl 2: 46%/ Lvl 3: 48%)
B14 xx EX DF3, D1, D1, D1, B122 xx DB2
(Lvl 1: 42%/ Lvl 2: 44%/ Lvl 3: 47%)
114 xx EX DF3, D1, D1, B122 xx DB2
(Lvl 1: 43%/ Lvl 2: 45%/ Lvl 3: 48%)
B122 xx EX DF3, B122 xx DB2
(Lvl 1: 39%/ Lvl 2: 41%/ Lvl 3: 44%)
CORNER (2 BAR)
B14 xx EX DF3, D1, F1B2, D1 xx DB2
(Lvl 1: 48%/ Lvl 2: 50%/ Lvl 3: 53%) (Props to @Mr Aquaman for being the reason I know about this combo, swaggy as hell)
B14 xx EX DF3, B14 xx EX DF1, F2, B14 xx DB2
(Lvl 1: 52%/ Lvl 2: 54%/ Lvl 3: 58%)
B122 xx EX DF3, B122 xx EX DF1, B14 xx DB2
(Lvl 1: 49%/ Lvl 2: 51%/ Lvl 3: 54%)
114 xx EX DF3, D1, D1, B122 xx EX DF1, B14 xx DB2
(Lvl 1: 53%/ Lvl 2: 55%/ Lvl 3: 58%)
I LEAVE YOU WITH THESE WORDS! SPOKEN FROM THE SUN GOD HIMSELF!
ENJOY THE GUIDE!
Last edited:

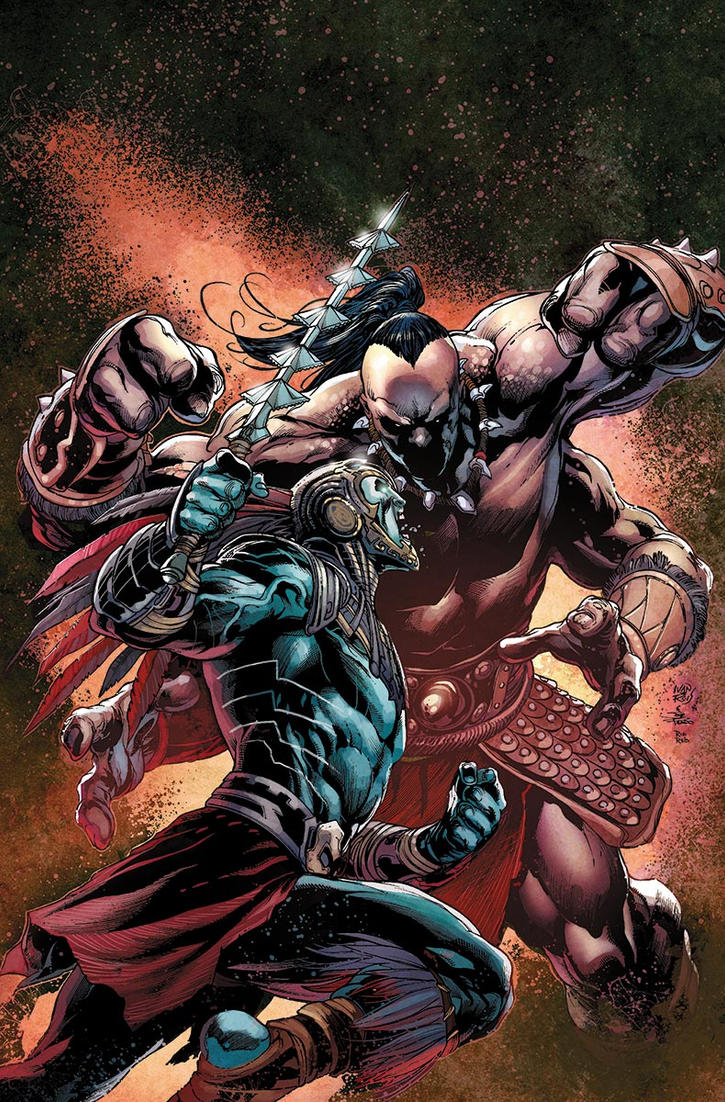
") , artwork is from official MK comic. So is the fact that Kotal actually ripped Goro arms.
, artwork is from official MK comic. So is the fact that Kotal actually ripped Goro arms.