


Eddy Wang
Skarlet scientist
Hat Trick Variation Guide 1.2
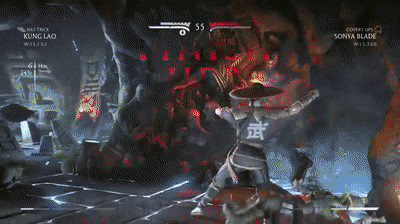
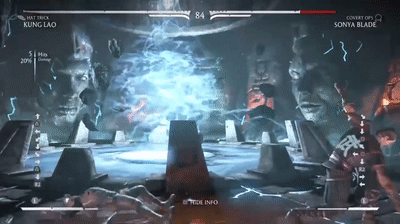
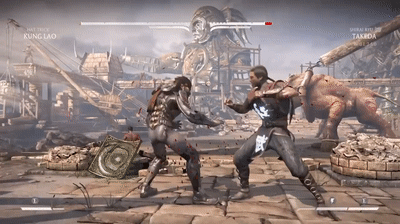
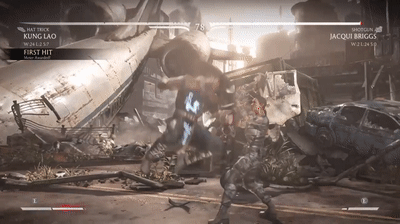
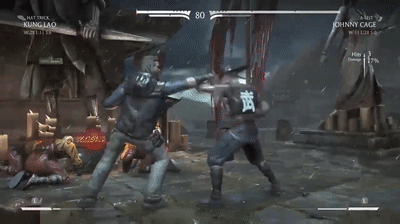
Kung Lao
Kung Lao
Welcome, in the incoming guide i will teach you how to play this new version of Hat Trick, he got some positive changes which eliminated some of his weakness, the risks are just the same but the rewards are now a little better and all traps now have its uses.
I'm calling this version 1.2 due the positive changes he got, i also don't believe this will be his final version specially because of his issues with some hitboxes on strings, call back still being -7 and hat traps being -5 or -4 at best
Index
1.1.Introduction
1.2.Variation basic rules
1.3.Hat Trajectory behavior1.4.Mid call back vs low call back pros and cons
1.5.Mid Hat Call Back pros and cons
1.6.Low call back pros and cons
1.7.Strengths and weakness
2.Best normals and strings
2.1.Pokes & Normals
2.2.Strings
2.3.Punishing String (Stay away from it, unless it hits, or you're about to use call back)
2.4.Strings you want to stay away from
3.Special Moves
3.1.Meterless Special moves
3.2.Enhanced Special moves
4.Strategy
4.1.Setting a trap in neutral
4.2.Forward trap in neutral
4.3.Round Trips/Hat Bluffs
4.4.Above Trap /Making your call back pressure -2 on block instead of -7
4.5.Hat Trap Presence game
4.6.Harass players with the new tools
4.7.New stagger with B1
4.8.Reversal Call Back poking game
4.9.Mobility
4.1.0.Dive kick new punishes
4.1.1.Dive Kick~call back
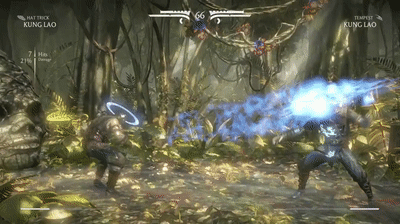
4.1.2.Hatarang
4.1.3.Trap Knockdown game
4.1.4.Setting a trap after 21 string
4.1.5.Setting a trap after B12,2+4 string ender
4.1.6.B12,2+4 in the corner option select game
4.1.7.Setting a trap after B321 string
4.1.8.Away Trap
4.1.9.Controling the space in the corner
5.Anti-Airs
5.1.Trip Guard punishes
6.Combos
1.1.Introduction
Hat Trick Kung Lao is a variation that plays mostly fundamentals to win, it has a strong execution barrier to minimize some of his weakness, his stronger position is corner where he is able to apply some sort of pressure with a lot of guessing in between and execution all included.
1.2.Variation basic rules
Hat Trick makes use of two stances, the default stance where KL wears the hat giving him access to more defensive options such as his spin, an overhead starter and exclusive command normals and strings.
And the Hatless stance, where KL throw his hat on the screen and stays there until he gets hit or calls it back, while hatless, Kung Lao loses access to his exclusive command normals, Spin and projectiles, trading them with more extended range and momentary space control.
- If Kung Lao gets hit while hatless, he returns into default stance, hat re spawns back into his head.
- If Kung Lao gets hit while hatarang, hat call back are already in trajectory, the hat will disappear or hatarang will get disabled returning Kung Lao into default stance.
Hat Trick most interesting design is how call backs will behave dependent on what traps you use.
Mid traps no matter where placed, once called back will follow Kung Lao around whenever he jumps or crouch until it reaches him on the top of his head, meaning, if you call back and jump, the hat trajectory will alter on its own adjusting it automatically until it reaches Lao.
Any low trap no matter where placed once called back will always travel back in straight line whenever Kung Lao jumps or crouch until it reaches his feet, low trap hits low and needs to be blocked in crouch otherwise it launches.
Above Hat Trap call backs will travel straight in to Kung Lao's head, they have a few uses, including preventing people to jump over hat trap pressure, the current patch gave him ability to even combo from these traps on certain punishes midscreen or corner.
Calling back from the air, will give Kung Lao a sort of glide which alters the landing trajectory either jumping forward or backwards.
1.4.Mid call back vs low call back pros and cons
Each one of the call backs has its pros and cons, each one is more suitable to determined functions, but they can be very practical.
1.5.Mid Hat Call Back pros and cons
- Trajectory can be altered with movement
- Hat respawn from a mid call back has active hitbox, it can hit opponents if hat trick is really close of the opponents when they less expect specially when hat is behind KL.
- Ex Call back launches really high on ground, sustain respectable height on airbone characters.
- Call Back is throw invincible, Kung Lao cannot be thrown during the animation startup of call back
- Ex Call Back is +13 on block making possible to loop some guaranteed pressure at cost of a bar of meter
- Regular call back is -7 on block, every character with a 6f d1 will punish every call back on block guaranteed, and all reversal special move that is at least 7 frames startup will punish from midscreen
- Must be blocked low.
- ex call back launches really high on ground
- feet tracking makes it perfect for some aditional setups
- Can be helpful to setup pseudo oh/low/throw mixup game in situations
- Doesn’t hit characters on hat respawn if hat is behind him.
- doesn’t alter the trajectory
1.7.Strengths and weakness
Hat Trick now can fight anywhere in screen, midscreen or corner, but is still preferable to take some matches in the corner, where he can set any trap at will and easily confirm many of his most damaging combos, call backs even meterless now make a stronger presence on screen since it has became easier to convert from on raw hits, and they got their speed increased slightly, a realy fast and damaging ender that allows him to combo from his dive kick, damage overall has inscreased to 52% practical damage, Hatarang works just the same making the strong presence on screen, and Kung lao can now combo without stamina, making his offense still a threat after they break again (finally a comeback factor), and on top of that, he can now combo with the hat on any direction, even the above one.
Hat Trick still has terrible backdashes, slow walkspeeds either forward or backwards, no plus pressure on any hat trap cancel being at the very best at -5 on block, call backs are still -7 on block making punishable by some characters and extremely difficult to apply pressure on them, cannot wakeup even with meter, his ex teleport is easily exploitable on wakeups.
2.Best normals and strings
Kung Lao now has some really good normals, with the general change on the armor, and some change on some buttons, he gained a few respectable ones which will be mentioned.
2.1.Pokes & Normals
B1
Hit levels: High
Description: A 7 frame high that is 0 frames on block, just as fast as his spin but safer, has decent range, can be used as a stagger poke, and is currently the most fearsome punishing normal Kung Lao has, it punishes anything from -8 to above, and makes it easier to come out of crouch block to punish specials, or trip guard atempts as well, links very easy from a dive kick on every stance, either standing, crouching, or airborne, can be hit confirmed from a D1 juggle, every -8 move in the game at blast radius its no longer safe against Kung lao.
F2
Hit levels: A 11f mid that is -1 on block, has decent range and can be used as a stagger poke, and its one of the best Kung lao punishing normals
S1 (Standing 1)
Hit levels: high.
Description: Using this normal, it makes it possible for Kung Lao to jab people out of the air specally against crossups, the normal design makes it more usefull to anti air than apply pressure on ground, in order to fight against it, most people perform early button presses to not get jabbed out which leaves them automatically open to crouch avoids in perfect position to trip guard punish using B12 string now.
Note: S1 has been nerfed, the float was considered a bug by the dev team and it was removed, making it so converting some crossup hits extremely difficult to do now.
B3
Hit levels: Mid.
Special proprieties: Throw immune, low crushing
Description: A 15f mid that can crush lows and throws it staggers on block and work as a good poke as well.
D4
Hit levels: Low.
Description: One of KL best pokes, hits low, and allows for safely cancel a hat trap when it hits, however, its only +7 on hit more about it on the strategies section, 10f of startup.
D3
Hit levels: low.
Description: Its startup is awful and very wonky, but has a sort of push back on hit or block
B4
Hit levels: Low.
Special Proprieties: Disjointed hitbox/ double hitting all in the default stance
Description: Somewhat safe low, but very slow on startup so its not very advisable to use as much in this variation.
F4
Hit levels: Overhead, overhead.
Description: An normal that hits overhead for a knockdown, however its not safe, being -13 on block makes it highly punishable, still a conditioning tool.
F1
Hit levels: mid.
Descritpion: 12 frames mid, that is now -2 when blocked, its purpose is to give decent damage on combos, can now be used as a stagger pressure.
F3
Description: A 19f normal that is actually +1 on block now, the advantage isn't that big but allows for easy punishing against counter poking after blocking it, forward/Above trap cancels out of this string is also safer to use now.
2.2.Strings
112124
Hit levels: High, mid, mid, mid, mid, mid.
Special proprieties: 212 part of the string can break armored moves due its speed.
Description: Kung Lao most used string, the 11212 part its only -3 on block and ending with the last button makes it -6 on block, only the 11212 part links with spin midscreen, since it starts at 8 frames, its advisable to master this string at any cost in order to become a second nature of the player, since KL relies on it to apply pressure, poke, stagger, punishing most of the time.
11212
Hit levels: High, mid, mid, mid, mid,
Special Proprieties: 212 part can break armored moves due its speed.
Special propriety 2: there is a small hop on the last hit, that once canceled into spin, makes the opponent get launched way higher
Descritpion: I'm setting this string apart from the above one for a single reason, this string alone has some specific combos that can lead Kung Lao damage to 32% meterless midscreen to 34% meterless in the corner, and its a technical aspect to learn because it helps Kung Lao stopping being a meter heavy variation and not waste it its uses on hatarangs combo extentions on certain punishes.
B12
Hit levels: High, mid.
Description: This string is very fearsome, 7f startup -4 on block, so its hit confirmable with spin, very few things in the game currently escape the threat of this tool, either people learn how to not put them in situations where Hat Trick can use it, or get punished, this is your main punishing string now, everytime you're in default stance and in a situation where 11212 won't connect use this string instead a full list of things B12 can blow up on block will be available down in the guide in the next days. The string also can be used to extend some technical juggle options that weren't possible before, including above trap call back juggle extentions.
B12, 2+4
Hit levels: High, mid, mid
Description: The ender of this string is now -3 on block, so it should be abusable by any means, even as a "get off me" string when you place a trap, the pushback is huge, enough to trick ppl to rush in and get punished by hatarangs, dive kicks, or anti-airs, and on top of that, it deals a lot of damage, even without spin as a filler, you can still get 20% off a dive kick, and this ender can extend Kung Lao's damage to 52% at the cost of two bars.
21
Hit levels: High, mid.
Special proprieties: Hard Knockdown.
Description: 2,1 its a juggle ender, and its one of the most trusting ones hat trick can rely too, due the hard knockdown it allows to set up traps every single time its used no matter the height or position the last hit connect on any opponent, -1 on block, 12 frames startup, good pushback on block.
B321
Hit levels: Mid, mid, mid
Special proprieties: Untechable knockdown, Special cancelable string.
Description: Different from the previous string, B3,2,1 has an untechable knockdown, it means, it cannot be tech rolled once you’re down, and the last hit is special cancelable, which makes among the top 6 strings hat trick can use, being able to cancel on hit with the untechable it allows to set a trap on any direction, including away off screen in order to conceal if either the hat was placed mid or low to apply a heavy guessing game.
4,4
Hit levels: High, Overhead.
Description: Kung Lao string, that last hit its a overhead launcher, starting at 14 frames, very damaging filler, has its uses on Hat trick due being able to connect from Hatarangs on hit most of the time, its also a 15f or over punishing normal for raw +30% damage off a regular bnb midscreen meterless or corner for +40% meterless.
F21
Hit levels: Mid, mid.
Description: Another string that has been cleaned, now is -3 on block instead of -8 making it safe and a safe stagger pressure string in case your hat trap game isn't working, still F21 cannot be canceled into spin, but you can combo from it, if you cancel into Hatarang instead.
F21D1
Hit levels: Mid, mid, low
Description: The last hit is a low, and its now -7 on block, the pushback on the string makes it safe, and a great use to harass people trying to poke out of F21~hat traps, will get hit by F21 every time, the cancel timing into trap from F21 is the same as F21D1 making it, impossible to react to the trap forcing a guess instead, however F21 is still a bit insafe if canceled into trap, so use it has a harassing tool instead since it sets up dive kick combos.
F34
Description: The part of this string is now +2 with a good pushback, good as a "get off me" poking string to regain space and rethink strategies.
2.3.Punishing String (Stay away from it, unless it hits, or you're about to use call back)
F23
Hit levels: Mid, low.
Description: Another string that its only useful if hits, most people aren’t that used to KL, but the truth is, F23 its -23 on block, has a gap in between hits, and its very unsafe on block either canceled from trap or hatarang, consider this a punishing string, it connects spin, and hammer punch from ex TP.
2.4.Strings you want to stay away from
F13
Hit levels: Mid, low
Description: The last hit is a untechable knockdown but doesn't do much for hat trick, its more of a buzzsaw "billsaw" specific string for some mixups, you can still condition ppl with F13 to make them stand still after a raw F1 gets blocked, but the last hit is heavily punishable, so stay away from it.
F3D3
Hit levels: mid, low.
Description: 19f startup, very slow normal, no real mixup, second hit its not special cancelable and its punishable if blocked(-12), making one of the worst strings KL has on his arsenal.
3.Special Moves
Hat Trick has all universal moves Kung Lao in general has, the only particularity being the hat traps and the hatless stance where he can stay for longer periods of time compared to the rest of his counter parts, making it able to merge the hatless exclusive moves more into his gameplay.
3.1.Meterless Special moves
Hat Toss: B,F+2 (Hold up or down to alter hat trajectory post tossing it)
Hit level: Mid.
Move type: Projectile.
Description: Hat Toss on itself has very limited usage, the only option being used fullscreen, its very punishable up close (-25 on block), the recovery on whiff isn’t great either, avoid at all costs unless fullscreen against no teleporting characters.
Dive Kick: D4 while in air.
Move type: Evading, air attack.
Special proprieties: Can be done from any directional jump, launches on grounded oponnents, has no air restriction.
Description: Kung Lao dive kick adds a bit more of mobility in him because it allows him to change trajectories, being able to jump off corners with dive kicks, render some advancing strings obsolete with jump back into dive kick or jump over into dive kick, as well as avoiding some tricking grounded projectiles.
Spin: DF+1
Move type: Anti-Air, launcher
Description: The traditional spin, very good anti-air, very punishable if blocked, active frames and 7f startup, a force be recon with, although its practically Kung lao’s only launcher in by default makes so that its use outside of confirming from strings a bit limited, the hitbox reach is also very narrowed so there are a lot of combos that are buggy when converting from them.
Teleport: DU
Move Type: Transportation.
Special Proprieties: Can be done in air has no air restriction.
Description: Kung Lao teleport has followups, in Hat Trick, while hatless, the overhead option is changed, forcing him to use his own hats, it makes it a bit shorter, startup can be sped up if yu instant jump into TP right away, but the difference isn’t that big.
Teleport Aditional commands
Hammer Punch: DU2
Hit levels: Overhead.
Special Prorieties: Disjointed hitbox.
Description: While being very punishable on block, the overhead is done with the hat, making it hard to stuff out if you don’t anticipate yourself to the move, juggling after successfully hits its also much easier.
Warning: Becomes a Hatless hammer punch while hatless, it has less range, and more air stall, harder to connect fillers when it hits.
Drop Kick: DU4
Hit levels: High.
Description: Although its safe on block and a hard knockdown on hit, is super punishable if ducked or whiff, and its very slow coming out of the teleport as well rendering this move usage to non use.
Command Throw: DU1
Hit levels: Throw.
Description: A throw that comes out of the teleport, its purpose is to mix it with people trying to block the overhead, it combos from any attack linked in air.
Tele-Kick: DU3
Hit levels: Mid.
Description: A mid kick -6 on block on any height, it comboes only on its way down, J2~DU3 into combos can be used, but the timing to link its extremely dificult and to some extent impractical.
Forward Trap: DF2
Move type: Setup.
Hit levels: N/A (hits mid when called back)
Warning: Enters the Hatless stance.
Description: Places a hat trap in front of him, in order to put the opponent in between KL and the Hat. Being the most useful trap its the one most players will be using all the time, either to build meter, or create space.
Forward Low Hat Trap: DF2D
Move type: Setup.
Hit levels: N/A (Hits low when called back).
Warning: Enters the Hatless stance.
Description: Places a hat trap in front of KL but on feet level in order to put the oponnent in between KL and the hat. Whenever KL uses hat trap he loses his overhead starter, however when this trap is in place he gains a -7 low launcher.
Away Hat Trap: DB2
Move type: Setup.
Hit levels: N/A (hits mid when called back)
Description: Places a hat trap behind KL, this is the most complex trap to use, it has his own advantages and his disadvantages well, more about the away trap in detail on the strategy section.
Warning: Enters the Hatless stance.
Away Low Hat Trap: DB2D
Move type: Setup.
Hit Levels: N/A (hits low when called back)
Description: Slightly slower than away hat trap, but still useful to the same extent, the applications are practically the same, except this one adds a oh/low mixup with a certain space and conditioning, providing better outcomes against some character options.
Warning: Enters the Hatless stance.
Above Trap: DD2
Hit Levels: N/A (hits mid when called back)
Warning: Enters the Hatless stance.
Description: Different from his other traps, this one can be used primarly to make call backs -2 on block instead of -7 as long as the opponent doesn't block the hat, the hat placement now can be used as anti-crossup against hat trap pressure, and while Kung Lao is grounded and the hat is in place, Hat Trick can now combo from it midscreen or corner.
Call Back: DD2 when hatless
Description: Calls the hat back to KL, whenever the hat its, its a combo extention tool, but also part of a space control strategy when used with his traps, it builds good meter even on whiff, however its -7 on block and some character can even reversal punish it.
Warning: Call back has no blockstun, so opponents are able to move at the exact same time you do when they block it, meaning, it doesn’t matter if you can move first, the second they blocked the hat there is no advantage and reversal attacks can be used to beat out anything you do.
Warning 2: Be wary that some call backs, specially from air are extremely minus if blocked against the opponent up close.
3.2.Enhanced Special moves
Has any other character in the game, Kung Lao has access to Enhanced special moves at cost of meter, being the area where he has 3 of the strongest tools that help the variation.
Hatarang: BF+2+Block
Move type: Multi-function.
Special Proprieties: Hat follows KL around on the way back like the callback mechanic.
Warning1: Temporarily leaves KL hatless
Warning 2: Has a 10f gap in between hits
Description: Hatarang ensures a full combo on hit, can be used to convert, to trade, extend damage, corner carry,, to start pressure or to cool down one, its by far the most trustful weapon Hat Trick has because it makes a very strong presence on screen with multi utility a tool to not be taken lightly whenever KL gets a bar .
Tornado: DF1+Block
Description: Pushes KL forward with 3 hits launching the opponent on the first one, it no longer has armor and its a very consistent 7f reversal, very punishable if blocked use it wisely.
Multi Dive kick: D+4+block
Description: A multi hit dive kick, very punishable on block, however can be made plus if trajectory can be aimed for only the first hit reach the opponent’s tip of the toe, making it plus ready for some pressure, but its one of the tools with little no use at all, considering this its also a dangerous tatic.
EX Teleport: D, Block, U
Special proprieties: Can be done in air, has no air restriction.
Description: 13 frames startup, has 2 hits of armor, aside from that all the followups are the same with no changes aside from the grab which another bar can be used to get a launcher.
Major Change: Now can connect his best strings into ex teleport as a single combo
Note: The bug that prevented ex teleport to be used from an air normal has been removed.
MB Teleport Grab: Block after ex DU1 connects
Hit levels: Unblockable.
Warning: Can only be used from ex teleport.
Description: If ex Teleport is used, when the grab is used, you can burn an extra bar of meter to launch the opponent granting a full combo then, part of one the 3 strongest Hat Trick’s enhanced.
Note: Connect from 11212, 112124, b12, F23, as a combo launcher from ex teleport helping hat trick away trap game far more in this variation.
Ex Teleport Hammer Punch: D, Block+U, 2
Hit levels: Overhead
Description: now that teleport is pretty fast it can be used to connect from strings, the hammer punch in particular connects from certain strings allowing him to switch sides when hatless
Note: Connects from: 11212, 112124, F23, F21, B12,
Hatless ex Teleport Hammer Punch: D, Block+U, 2
Hit levels: Overhead
Description: Hatless version that can be used to extend away trap combos making it fearsome on punishing
Note: Connects from: 11212, F23
Ex Teleport Kick: D, U+Block 3
Hit levels:Mid
Description: Ex teleport kick now can be used to extend combos to 40% against specific characters
Notes1: 11212~ ex tele kick Midscreen works on: Goro and Ferra/Torr
Notes 2: 11212~ex tele-kick in the corner works on: Goro, Ferra/Torr, Predator, Alien, Kotal Kahn, Raiden, Jason, Tremor, Quan Chi, Jax, Leather Face.
Strong Call Back: DD2+Block
Special proprieties: Launches higher on hit making some combos far easier to convert.
Hit levels: Mid or Low (Hat trap dependable).
Description: On the contrary of his regular counterpart, ex Callback its among the 3 most useful specials Hat Trick can use, it gives him +13 raw up close to work with, giving him access to loop-able pressure, it can also be made super plus, if you manage to hit a character with it while already in motion, the highest plus frame i could measure was over +19 on block, which would ensure guaranteed overhead options, loop-able pressure, or loopable hat traps placements against incorrect blocking
4.Strategy
Hat Trick is a pure fundamental variation, in order to win you need to gain your momentum and never lose it, its one of the few variation that requires very high speed motion and execution, very quick thinking, and game plan set in advance, requires studying opponent’s behavior in order to extend your options further,he is an extreme conditioning character, has constant alterations on game play in order to answer some of your opponents best actions with reactive play, in sum, Hat Trick doesn’t work for you, he only does a little part of the job, the rest is just you.
Corner is now an option where you may want or not want to be, now that everyone has 2 hits of armor, Hat Trick has lost his armor breaking setups with hatarang or F4, some armors can still be broken by the 212 part of the 11212 string, but those are very risky and difficult in first place, so you better off baiting wakeups now.
4.1.Setting a trap in neutral
F2~ hat trap, B2~hat trap, B3~Hat trap are your only options to either set a trap on hit or block while in neutral, all these options are string starters since F2 and B3 staggers you can maximize its effect by canceling into a trap, B2~however it doesn’t stagger but its safe on block, by canceling into hat trap it turns into a stagger option.
D4~hat trap it can only be used on hit since its +7 on hit but its not combo able by anything.
4.2.Forward trap in neutral
Trap Mental advantage
When a trap is placed near the opponent, on knockdowns they’re compelled to not risk too much due block punishing, although it goes away in one hit, mostly every opponent fears randomly getting hit by anything so they become more cautious on how or when to poke you out, which ensures Hat Trick the game of staggering, free throws on wake up, and baiting up, however this edge will always go away when you call back the hat due being -7 nearly anyone can challenge whatever you do, unless you Ex for a +13 loop-able pressure.
4.3.Round Trips/Hat Bluffs
Its the custom name given to Hat Trick ability to place a hat trap in front of him and immediately call back, making a sort of manual boomerang giving him access to a sort of mind game zoning, space control and meter building. Its not as safe as it looks, ballsy players will for sure challenge your anticipation cells and try to run in for a combo trying to pick a momentum to get in and hit you in between.
However since the stamina nerfs, getting hit while running drains away half of their stamina, and call backs have been buffed to hat Trick can get combos from it, at any distance, which will ensure this tactic more rewards if connect for the same exact risks.
However you can bluff round trip at any point either calling it back or launching it, the unsafest moment is when launching it due the recovery being longer and being a non attack move, while calling it back its only -8 at whiff distance and can launch anyone inside the trajectory, you can either bluff by letting the hat out and wait for them to charge as you B321 into call back for example, any other options also works depending of characters, or you can bluff by throwing a hatarang full screen in between trips, most people are hit by the hatarang when they decide to charge in thinking you’re placing a trap since its the instant were your gap is also longer it makes them often charge straight into the hatarang.
4.4.Above Trap /Making your call back pressure -2 on block instead of -7
The fairly new feature in Hat Trick game now is that he can now actually combo into above trap Call back as long as he has 1 bar of meter midscreen, and none in the corner by simply landing a dive kick, with the help of B12 out of a ex hammer punch, its possible to combo from above traps up close at the cost of 1 bar
B12~ex grab MB will also combo with B12 at cost of two bars if he is slightly away.
But the further they get away from hat trick, B321 into above call back will actually work as well for more damaging combos.
But this is only important as the new layer that above trap brings into the game, by canceling some of his best strings into it, like 112124~call back, instead of -7, Kung lao will be at -2 on block, allowing him to move earlier, press buttons earlier, jump and so on, making it extremely dificult to be touched at due the dive kick punish.
The goal of this strategy however is so that your opponent can respect the dive kick options, which will allow you for more loopable pressure in the corner, midscreen they may still try to challenge hat trick, which opens for regular punishes with his other combo able strings., so this is a big dilemma hat trick will have to face, since either above trap and forward trap have the same startup and recovery can be used the same way, but the outcome is different in call back, since one will always be -7 on block, but the other will be -2, with some dificulty in landing a combo from it since he loses the spin.
4.5.Hat Trap Presence game
Now due the new changes, you can now get a life lead, sit on at least 2 bars or meter, and leave your trap in the screen idling, forcing your opponent to either come to you, or stay there until the trap time runs out, this strategy will force players to approach carefully since they will enter call back zone, and will make the most impatient ones firing projectiles when outside of it, teleport and much more, the tech still pays off when you have a life lead and you want to kill time, they can way there for full 7 seconds waiting for the trap to run out, but will require some fast reactions from you in order to let them still inside the trap area.
The further you place the trap away from the the bigger the screen you will control. the less the hat is in front of you, the bigger they're compelled to come to you and will choose to fire a projectile instead, which opens for ex teleport grab on fast projectiles, and ex hammer punch on slower ones leaving them in between Lao and the trap anyway.
11212 its the most usable string Kung Lao can use, however its execution its not easy, but its a unskip-able requirement in order to fully tap into KL potential either for pressure, punishing, stagger, hit confirm, which are the most common options where using this string without failing becomes a predominant factor considering its a 8f startup string.
11212 by itself is -3 only and its special cancel-able, it can be used as stagger pressure bluffing with cancel/no cancel/112124~hat trap, giving different timings on the opponent to try to retaliate to, one slight delay on their part and your low profiling poke can catch people trying to poke out of pressure.
Canceling from 112124~hat trap its also safer, allowing you to block a poke and retaliate right away with 11212 again. You can also backdash after, or jump back to bait people out with risky moves, but be wary that canceling into hat trap it can be a risk, so 11212 with no cancel its your safest option and what you do from there its entirely on the opponent’s way to approach how he thinks you’re playing.
A few good options its after you land a 11212 are, you can F2 check people, but F23 has a gap, and F21~hat trap isn’t as safe, but are required in order to impose your opponent’s options against your own, when they are aware that you can put these out to keep them in check you get yourself another 11212 string window to use.
4.6.Harass players with the new tools
Now you can annoy people by doing F21D1 all day, F21 no D1 and no trap and bait people with dive kick punishes trying to move out of it, most of the the time the last hit of the F21D1 string will connect on players trying to poke out thinking a hat trap is coming.
B12,2+4 also works the same way since it has a lot of push back
4.7.New stagger with B1
Now you can also use B1 solo to stagger people and invite their impatience to kick off and trigger an in-volunteer button to open they punishing window even after pokes.
4.8.Reversal Call Back poking game
Still if you place a hat trap out of some pressure, some players will simply poke, and poke multiple times to not get punished by B1, to those players you can reversal by doing a call back the instant you're blocking a D1, if they try to go for it one more time, the previous placed trap returns a 8f mid and launches them instead, but if blocked you will be at -7 instead
4.9.Mobility
Kung Lao isn’t a very mobile character he walks very slow which makes him dificult do avoid advancing strings and specials while on ground, makes it very hard to play footsies,, his backdash is very horrible as well, doesn’t travel as fast and has very long recovery in general, leaving him mostly at neutral in many cases, so you will find yourself jumping back a lot to avoid strings, or jumping forward with a little help of the dive kick to avoid most of the things that would usually hit against other characters, don’t be afraid to jump back into call back or when the oportunity arises whiff punishing if they whiff and the recovery is longer, or an air punish with a dive kick.
4.1.0.Dive kick new punishes
Dive Kick B12~spin
Kung Lao B12 string has been buffed, as consequence now he can do combos from dive kick much easier with less drop factors and more damage and more threats, so instead of doing dive kick into d4~spin, now hat trick can do dive kick into B12~spin consistently independent of the character stance, giving him staminaless combo conversions even right after immediate breakers, with this it gives him a few more threats against poking, although the risks of getting punished are still there, the reward is a lot more better now, specially after breakers
4.1.1.Dive Kick~call back
Its a new way to combo from dive kick that wasn't possible before due the regullar call back juggle issue, with that out of the way, hat Trick can now convert damage off of a dive kick call back successful hit, he can extend for more damage to 30% at the cost of meter, but the default result is also very good with the new ender, so when you place a trap in neutral, now you can condition people to not poke back
4.1.2.Hatarang
The most trustworthy tool on hat trick’s arsenal its his Hatarang, its plus from fullscreen, its a long range combo starter move, can be used to trade against projectiles, it can be used to start pressure, its a poke from fullscreen, a long reaching normal, a projectile, gladly all Hat Trick’s neutral game doesn't revolves around this tool alone anymore.
A lot of fast advancing normals characters fear doing so against hat trick not because of round trip, but mostly because Hatarang, you can throw it even to whiff punish, you can bluff it out of round trips, or to hit people trying to run against you, however there is a 10f gap in between hits which will most of the time be avoided by low profiling d4’s or armoring out if done way too close once blocked, still you can punish those motions with dive kicks, J2s, or F2 into full combos, the action of coming running after a hatarang being used throws ppl timing off most of the time and they end up getting hit by the hat instead giving you a free combo while you come in.
Now with the running and stamina mechanical changes, this tool is even better.
4.1.3.Trap Knockdown game
The trap knockdown game is far more deadly, it allows hat trick to either go big or go home, corner knockdown game are the best setups and easy to keep momentum since it gives him loopable pressure and 50-50 options. Midscreen he has some setups with away trap and front low trap that are easily blown off, since its disrespectful enough, but now there is a big twist, if any character think they can just going out wild out of your away trap mixups and you read them, there is now legit ways to get guaranteed over 40% combos, knowing your way around your opponent’s counters will net you swag damage,resets, and either they respect you or not each one has a counter .
4.1.4.Setting a trap after 21 string
The best positions to do so are when you land a 2,1 hard knockdown string out of any combo, even mid screen 2,1 allows you to dash up and safely place a forward trap behind the opponent, with no dash you can set any trap, which is why its advisable to end all your corner combos with 2,1 mostly due the setup time being plently to try anything else post knockdown.
4.1.5.Setting a trap after B12,2+4 string ender
This one is fairly new and its very damaging, you can set a trap from it on hit by sending characters full screen, and them hold them off with a hat trap presence forcing them either to run against you or stay there while the time passes.
4.1.6.B12,2+4 in the corner option select game
Normaly its not safe to place a trap out of this string if they're cornered by you due the tech roll, but you can then bait buttons with D4 into ex teleport, hat trap, or B321 if they do, and if they don't, a regular hat trap can be placed safely for a mixup game.
4.1.7.Setting a trap after B321 string
Second Hard knockdown string Hat Trick relies itself mostly on since its special cancelable, untechable knockdown on hit, it allows to set any trap as necessary against any character, its his best midscreen trap when forward trap or forward low trap are canceled from this string it safety places the trap right behind them. Giving you a 50-50 mixup straight away with the low trap, either they get hit by F4 which pushes them out of the trap at the cost of some damage or get launched by the low option.
There is also a 50-50 option by slightly walk a bit backwards, then jump at the opponent setting a overhead/low mixup on them which you can either J2~ex call back, or just ex call back for the low option, both being safe on block and the low option being at the very least +12 on block.
My favorite option out of B321 is with Away trap/ Away low trap, when used to finish a string with this the hat is set away from the screen and its very hard to tell which one was used, both trap have different uses, and one same damage conversion for a reset, its in my honest opinion his most beatifull setup, but its greats weakness as well, so here is how it works.
4.1.8.Away Trap
When you land a B321~away trap combo ender, your character will recover a little bit slower than forward trap but the hat is no where to be seen, you become wide open with no defense since you’re going in hatless against your opponent with your only launcher bing 4,4 strring at 15 frames startup.
Those willing to risk a wakeup can do so, they can also try to back dash in order to escape from you, jump forward, in sum try anything to prevent you to try anything
But this particular aspect of the variation has been buffed not only because of the combos canceled from ex teleport, but also because call back juggle heights have been adjusted giving him consistent fillers that were dificult to get at good heights.
Now you have at least an 8f punisher if you have a bar and a 7f one with two bars, making them fear of trying anything to prevent you to try anything, they're now forced to react to your options rather than just go ham on all knockdown, this allows now hat trick to do the following.
Jump and do a call back at the very highest point in height: it avoids some wakeups, and uppercuts, if you placed an low trap you get a free combo, but they can still jump over you
Jump 2 into string into call back: beats jumping on you thinking its a call back, may or may not beat uppercuts, get a free blockstring up close.
J3 into low call back: beats uppercuts on reactions, convert combo from low call backs
No jump bait a reaction: beats uppercuts trying to prevent you to crossup, backdashes which allows for clean punishes, something that wasn't possible before since ex teleport into grab was more of a gimmick, now this is a true legit punish from this mixup game, and this is by far my favorite option.
If they just block and you did 112124~call back you can still use the same setup as long as you have 2 bars since its -7 the armor will shield you while your hat is coming for the same outcome.
A 3rd option is to jump torwards them with a dive kick after they block 112124~call back letting the hat do the work while you fake a crossup, if they retaliate will get hit by the hat, converting off this is dificult but not impossible, its also possible to convert with a dive kick after you jump.
Maintain your loopable pressure in the corner with some guessing
Ex call back its the most usable tool in the corner since its +13, every time the opponent blocks ex call back, they’re most likely forced to stand to block a B2, when they stand to block a B2 because its a overhead combo starter, you can D4~hat trap on hit which is +7.
Be aware that being at +7 doesn’t simply allows you to hit another 112124~ex call back, although its not impossible, if the opponent tries to reversal with armor it just won’t come out since there is only a perfect 1 frame in between d4~forward trap and standing 1 from the 112124 string, however they can still mash uppercut, d1, d4 in order to interrupt the loop there, or even neutral crouch the first hit which then leaves a lot of gap to the second hit of the string allowing you to armor out then. So how do you shut down?
By using F21 instead, which is 11 frames but covers crouching and will eliminate any mashing armor aside of course but still doable.
Problem is, this option makes your meter build option a bit limited, but pays you off with damage.
If they don’t stand after the ex call back, B2~hatarang will work as a wakeup call, ending any combo from there with a low trap for a 50-50 in the corner its never too much
Now with the recent buffs a few updates on his corner pressure are made, they're riskier but the reward is just as great specially against people that enjoys to poke their way out of everything.
Now you can place an above trap out of some safest strings in the corner to prevent crossups, the thing is, the B12 buff now can be used from dive kick, so no matter where your hat is, above, behind them or behind you, as long as they're cornered a dive kick launcher will connect any call back for full combo damages so having the hat above you or behind allows you to came off at -2 out of every call back giving you room to punish pokes with dive kick combos, overtime they will respect this option more and more, and we will definitely start to get loopable pressure more often, specially with the new dive kick threat.
4.1.9.Controling the space in the corner
An alternative of rushing down in the corner with loopable pressure is by using staggers, as we said before hat trap behind an opponent its like a time ticking bomb, they will be very selective on what to press, and with hat trick using staggers makes it so that randomly mashing an attack if it doesn’t reach you are likely to get whiff punished so the mental pressure gets to them, enjoy trying anything.
This method has also been buffed due the jump attack nerfs, having the hat in the corner, you can easily anti air them into call backs with s4, which does a lot of damage with the right combos.
5.Anti-Airs
With the jump attacks having their hitbox expanded for 1 frame before the active frames now allows Kung Lao a better control off the air against some characters in general, still a bit difficult to stuff some opponents out of the air in general, but now your regular spin cannot be stuffed out unless is a disjointed hitbox
Jab AA
Kung Lao is one of the characters who has a jab with a good hitbox to anti-air, so he got the previlege to AA people of of the air with Jabs either from far away jumps, crossups and njps, he can also chase people with run and jab them as they jump backwards.
However be wary that his jab won't float as much anymore, so anti crossups conversions out of hat traps are now very dificult to do without meter
Tele3 AA
If you can predict jump back trajectories earlier, your teleport 3 is likely to Anti-air, however there is also a risk featured due the slow startup, but works in most cases.
With the ex teleport buffed tele3 AA can now connect most of the time, it also works out of some strings.
Spin
Spin its one of his most reliable AAs, sadly still loses to disjointed hitboxes,being his only launcher you need to know how to capitalize your damage.
5.1.Trip Guard punishes
Kung Lao can now used B12~spin to punish trip guard atempts on forced whiffs, on top of that if you're hatless you will still be forced to use 11212 since its faster and its the fastest string that convert an ex hammer punch hatless to get the full combo from a trap placed in reversed position
6.Combos
In the final section of the guide i will finally post combos, those are separated by utility in combat, and conversion post setup, remember that hat trick mid screen always ends his combos with 21, or b321 to safely place a trap after. Ending combos with F4, F14 won’t give you enough plus frames to do that.
Aside from that in the corner he can use 112124~trap (any trap) to use post knockdown, even if 11214 its a soft knockdown the trap is safe and condition people to not wakeup right awat in order to avoid getting armor broke by the 212 part of the string in some occasions, or being blocked since a hatless Lao with the setup in motion do more meterless damage.
Now since the buffs, his juggle physics are probably the most different among the entire cast, so there is a new section for combos this character can do and are advisable to master, if you want to play at full potential and less meter reliance, the new combos are all high lighted in blue.
Notations
/ or
~ canceled into
+ 2 buttons together
rc - run cancel
jk - jump kick
jbk - jump back kick
NjP - neutral jump punch
trap - any trap (above, away, front, front low, away low)
round trip - forward trap~call back
iadk ~instant air dive kick
ex tp 2 - advanced teleport hammer punch
ex tp 1mb - advanced teleport grab into meterburn for extended damage
Metelerss Combos (Beginner level)
11212~spin, jk~dk, 21/F13/B12,2+4/B321~trap [ 23% - 25% - 27%]
B12~spin, jk~dk, 21/F13/B12,2+4/B321~trap
F23~spin, jk~dk, 21/F13/B12,2+4/B321~trap
15f punishing
44, rc, b321~spin, jk~dk, 21/rc B12,2+4
Hatless midscreen combos (Hat behind the opponent (Beginner level))
11212~call back, b321~spin, jk~dk, 2,1/B12,2+4
B12~call back, B321~spin, jk~dk, 21/B12,2+4
112124~call back, b321~spin, jk~dk, 2,1/B12,2+4
F23~call back, B3221~spin, jk~dk~F21~trap (to gain space)/B12,2+4
11212~/F23~F21~/112124~/call back, spin, jk~dk~B321~trap/B12,2+4
Overhead starter meterless midscreen
B2~spin, jk~dk~b321~trap
b22~round trip, rc F2~spin, run, jk~dk 2,1/B12,2+4
B22~round trip, iadk, b12~spin B321~trap
B22~round trip, rc, b32~spin, rc, jk~dk, 21/B12,2+4
Midscreen meterless combos (technical, advanced level, helps to save meter a lot)
11212~spin, rc, s4~hat trap, B12~call back, jk~dk 21/ B12,2+4 [30% - 32%]
11212~spin, rc~s4~hat trap, b12~call back, iadk, jk~dk 21/ B12,2+4 [28% - 29%] easy version
B12~spin s1~hat trap, B12~call back, jk~dk, 21 / B12,2+4
F23~spin, s1~hat trap, b12~call back, jk~dk, 21 / B12,2+4
B12/F23~spin, s1~hat trap, d1~call back, iadk, 21 /B12, 2+4 easy version
Hatless Midscreen meterless combos (Hat behind the opponent(technical, advanced level))
112124~call back, s4~spin, hat trap, B12~calll back, jk~dk, 21 / B12~2+4 [ 31% - 33%]
11212~call back, s4~spin, hat trap, B12~calll back, jk~dk, 21 / B12~2+4 [ ???% - ???%]
B12~call back, s4~spin, hat trap, B12~calll back, jk~dk, 21 / B12~2+4 [ ???% - ???%]
Midscreen 1 bar
When KL uses meter on his combos are not only to do more damage, but also to extend the corner carry.
112124~Hatarang~4,4, B321~spin, jk~dk, 2,1 (Same filler for any other starter)
112124~Hatarang~11212~spin, jk~dk, b321~trap (Same filler for any other starter)
B321~ex spin, NJP, jk~dk, 2,1
b2~hatarang~44, B321~spin, B321~trap
B22~hat trap~ex call back, rc~b321~spin, jk~dk, 21
B22~extp3~F2~spin jk~dk, 21
B321~ex spin, hat trap, b12~call back, iadk, b12,2+4 / 21
Hatless (Hat behind Kung Lao can be low trap, opponent not on linking range)
11212~ex tp, 2, b321~call back, s4~spin, iadk, 21
11212~ex tp, 2, b321~call back, s4~spin, jk~dk, rc, b12,2+4
f23~ex tp, 2, b321~call back, s4~spin, iadk, 21
f23~ex tp, 2, b321~call back, s4~spin, jk~dk, rc, b12,2+4
112124~ex tp1mb, b321~call back, s4~spin, iadk, 21
112124~ex tp1mb, b321~call back, s4~spin, jk~dk, rc, b12,2+4
B12~ex tp1mb, b321~call back, s4~spin, iadk, 21
B12~ex tp1mb, b321~call back, s4~spin, jk~dk, rc, b12,2+4
B32~ex tp1mb, b321~call back, s4~spin, iadk, 21
B32~ex tp1mb, b321~call back, s4~spin, jk~dk, rc, b12,2+4
11212~ex tp1mb, b321~call back, s4~spin, iadk, 21
11212~ex tp1mb, b321~call back, s4~spin, jk~dk, rc, b12,2+4
F23~ex tp1mb, b321~call back, s4~spin, iadk, 21
F23~ex tp1mb, b321~call back, s4~spin, jk~dk, rc, b12,2+4
Hatless (Above trap)
11212~ex tp, 2, b12~call back, s4~spin, iadk, 21
11212~ex tp, 2, b12~call back, s4~spin, jk~dk, rc, b12,2+4
B12~ex tp1mb, s4~call back, s4~spin, iadk, 21
B12~ex tp1mb, s4~call back, s4~spin, jk~dk, rc, b12,2+4
Hatless (Above trap (further away)
112124~ex tp1mb, b32~call back, s4~spin, iadk, 21
112124~ex tp1mb, b32~call back, s4~spin, jk~dk, rc, b12,2+4
Corner combos, meterless
112124~spin, NJP, J2, jk~dk, 112124~trap
4,4, 4~spin, njp, jk~dk, 112124~trap
4,4, 1, b321~spin
B22~forward trap, d4~call back, b321~spin, jk~dk, 21/112124~trap
b22~forward trap, 11~call back, B321~spin, 2,1 trap
B321~spin, forward hat trap, b12~call back, jbk~dk, 21 / B12,2+4 [32% - 34%]
44, b12, b12~spin, NjP, jk~dk, 21 / B12,2+4 / 112124~trap
B22~above trap, B1, B12~call back, S4~spin, jk~dk, 21 / B12,2+4
B22~forward trap, D1, S4~call back, s4~spin, jk~dk, 21
Hatless (forward trap) (all hatless combos are all changed, these are all new)
112124~call back, s4~spin, hat trap, b12~call back, jbk~dk, 21 /B12,2+4
F23~call back, s4~spin, hat trap, b12~call back, jbk~dk, 21 /B12,2+4
B12~call back, s4~spin, hat trap, b12~call back, jbk~dk, 21 /B12,2+4
S4~call back, s4~spin, hat trap, b12~call back, jbk~dk, 21 /B12,2+4
B321~call back, s4~spin, hat trap, b12~call back, jbk~dk, 21 /B12,2+4
112124~call back, 44, d1, s4~spin jk~dk, 21 [35%]
112124~call back, 44, d1, b12~spin, jk~dk, 21 [33%]
44, d1, s4~call back, s4~spin, jk~dk, 21 [39%]
B321~call back, s3~forward trap, B12~call back, s4~spin, jk~dk, 21 [40%]
Hatless (forward low trap)
112124~call back, B321~spin, NjP, jk~dk, 21
F23~call back, B321~spin, NjP, jk~dk, 21
B12~call back, B321~spin, NjP, jk~dk, 21
B32~call back, B321~spin, NjP, jk~dk, 21
112124~call back, s4~spin, hat trap, b12~call back, jbk~dk, 21 /B12,2+4
F23~call back, s4~spin, hat trap, b12~call back, jbk~dk, 21 /B12,2+4
B12~call back, s4~spin, hat trap, b12~call back, jbk~dk, 21 /B12,2+4
S4~call back, s4~spin, hat trap, b12~call back, jbk~dk, 21 /B12,2+4
B321~call back, s4~spin, hat trap, b12~call back, jbk~dk, 21 /B12,2+4
Corner for a bar
112124~hatarang, 44, d1, s4~spin, jk~dk, 21
Dive kick combo starters midscreen
iadk, B12~spin, b321~trap
iadk, b12~spin, rc, j2, rc b12,2+4
iadk, b12~spin, j2, rc, s4~hat toss
Hatless dive kick combo starters (hat behind the opponent close to the trap)
iadk~call back, B12~spin, B321~trap
iadk~call back, B12~spin, rc,, j2~rc b12,2+4
iadk~d4~call back, b12~spin, rc, j2, rc, b12,2+4
iadk~d1~call back, s4~spin, b12,2+4
Hatless dive kick combo starters (Hat behind the oponnent, further away from the trap)
iadk, b12~call back, s4~spin, b12,2+4
dive kick combos in the corner
iadk, b12~spin, jbk~dk, b12,2+4
hat less (Hat above, behind KL or behind the opponent)
iadk, b12~call back, s4~spin, j2, jk~dk~b12,2+4
Guide subject to future changes as they appear
Old guide link, which i will politely request youph to lock it up.
https://testyourmight.com/threads/hat-trick-kung-lao-guide-1-0.61375/
@Youphemism
@The PantyChrist
@Big Pampering
@just_2swift
@myri
@ROG Moonspell
@ETC Mcfly
@Roko1985
@daddydab32ho
@YOMI FOREVER KING
@Captain l2ed
@Carl
Last edited:


")
